
The sealant is the smallest component on a flexible stone wall and the one that decides whether the wall’s edges and joints age gracefully or become the callback list. The stone sheet, the adhesive bed and the substrate all do their jobs for decades; the sealant is a consumable — elastic, exposed, and designed to be renewed. Most projects never say which sealant, where, in what joint geometry, or when it gets replaced, and the result is the familiar pattern: a beautiful wall whose perimeters and wet-adjacent joints crumble first. This guide covers sealant as a programme: what the joint is actually doing, which sealant families suit which exposure, the joint geometry that makes sealant last, and the renewal schedule that keeps every line serviceable.
What is the sealant joint actually doing?
Three jobs, and confusing them is how joints fail. Movement joint: where two surfaces that move differently meet — field-to-field at a perimeter, stone-to-glass, stone-to-metal trim — the sealant is the flexible element that lets them. Weather seal: at wet and exterior edges, it keeps water on the outside of the assembly. Finish line: at flush tool joints, it reads as part of the design. A joint asked to do all three at once needs to be designed for the hardest of the three, and the geometry follows: enough depth and width for the movement, a backer so the sealant stretches in the right shape, and a tool that leaves the surface flush and clean.
The failure signature tells the same story. A sealant that has torn on one side and adhered to the other was asked to absorb more movement than its geometry allowed. A sealant that has gone rigid and cracked was the wrong family for the exposure. A sealant with voids at the corners was applied to a joint without a backer. Each failure is a specification answer waiting to be written down — which is why the joint belongs on the drawing, per the clause logic in our contract guide, not on the installer’s judgement call.
Which sealant families suit which exposure?
Three families cover the work, and the choice follows the joint’s exposure and its neighbours. Neutral-cure silicone is the wet-zone and exterior workhorse: permanently elastic, water-proven, and the family most wet-area systems specify. Its caveats are substrate compatibility — some faces need primer — and paint-ability, which it refuses. Polyurethane and MS-polymer hybrids carry the movement-heavy interior joints and the paintable ones: strong adhesion, good movement capacity, and a finish that accepts coating where the design wants the joint to disappear. Acrylic is the interior dry-joint filler that paints beautifully and moves poorly — right for a static internal reveal, wrong for anything that flexes.
Two compatibility rules apply across all families. The sealant must be approved by the cladding system for contact with the stone face and the adhesive system — the same one-system logic our adhesive selection guide applies to the bond line. And in a wet zone it must suit the membrane behind: a sealant that bonds to the tanking product where the joint passes through it is part of the system, per the layer logic in our wet-room guide. When in doubt, the manufacturer’s written confirmation costs one email and voids one argument.
What geometry makes a sealant joint last?
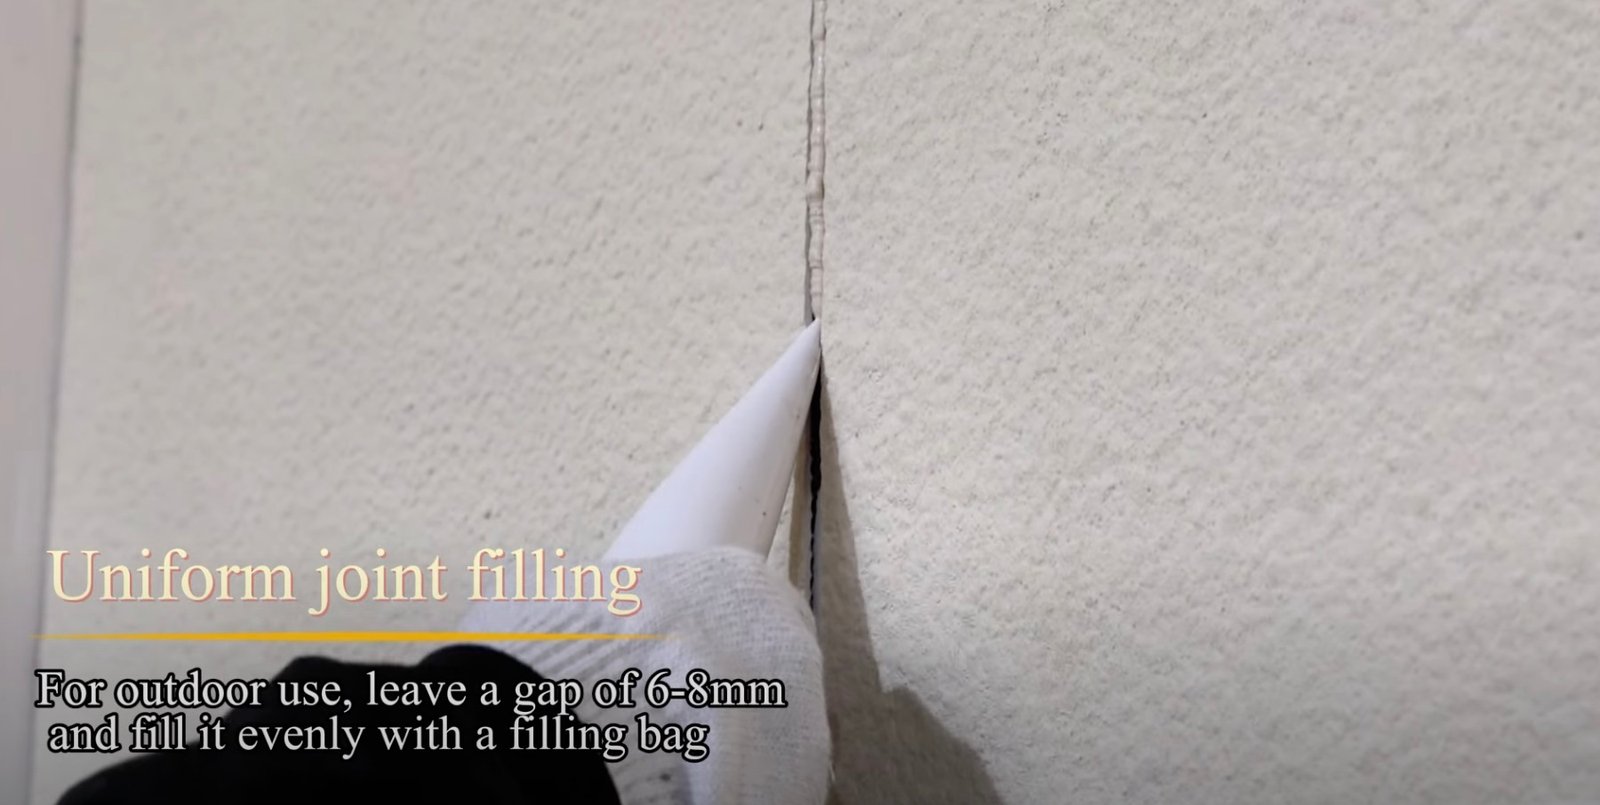
Sealant fails by being asked to stretch wrong. The lasting geometry: joint width and depth in the proportion the sealant manufacturer specifies, closed-cell backer rod setting the depth so the sealant stretches in an hourglass rather than tearing off a face, and edges masked and tooled so the bead is concave and flush. On stone specifically, the cut edge the sealant lands on should be dressed and clean — a ragged edge gives the bead a ragged anchor — and the joint should never be a bridge across an open gap with nothing behind it.
Where the joint crosses a difference in stiffness — stone field to metal trim, stone to glass — the geometry does the engineering: enough width for the two faces’ relative movement, the backer centred so neither face is over-adhered, and where the movement is large, the joint widened rather than the sealant thickened. The same principle our glass junction guide 및 movement joint guide apply to the field applies here at bead scale: the joint is a designed element with a width, a depth and a purpose.
What is the renewal schedule that keeps every line serviceable?
Sealant is on a calendar, and the calendar belongs in the building’s maintenance plan. Wet and exterior joints: inspected yearly, renewed when the inspection shows hardening, tearing or adhesion loss — commonly on a one-to-three-year rhythm depending on exposure and product. Interior dry joints: inspected less, renewed when the line reads tired. The renewal itself is simple and cheap: old bead fully removed, faces cleaned and prepared as the product requires, new bead applied to the same geometry. What the schedule prevents is the expensive version — a joint left past its life, water travelling behind it, and the failure arriving as a wall problem instead of a line problem.
The handover is where the schedule is born: the completion photos record every joint as-built, the maintenance file lists them by location and family, and the inspection walk from our inspection logic includes the joint lines as their own item. A wall whose joints are on a calendar is a wall whose only ageing mechanisms are managed ones.
What are the recurring sealant mistakes?
- Acrylic in a moving joint. Paints beautifully, cracks on the first season’s movement. The family is for static internal reveals only.
- No backer rod. The bead fills a deep gap, adheres to both faces and the back, and tears at the first real movement.
- Sealing over dust. Adhesion to a dirty edge is adhesion to dust — the bead peels with the film.
- Wrong family at the membrane. A wet-zone joint sealed with a product the membrane rejects becomes the leak path itself.
- Renewal by topping up. New bead over old is a cosmetic line over a dying one; renewal means removal to clean faces, every time.
What does the sealant programme look like on a real project?
The programme is short enough to be a page and valuable enough to be a contract line. At specification: every joint drawn with its job, width, family and backer noted — perimeter, wet, exterior and trim joints each named. At handover: completion photographs of every joint type, the maintenance file listing locations and families, and the first inspection date already in the calendar. Yearly: the walk reads each line — elasticity by press, adhesion by sight, corners by close look — and the renewal list comes out of the walk rather than out of a guess. The cost of the whole programme across a decade is a fraction of one remedial wall, which is the arithmetic that makes it an easy sell to any owner.
The programme’s quiet benefit is assignability: when a joint fails early, the drawings, the photographs and the family notes answer whether the geometry, the product or the application was at fault — the same evidence-first logic our liability guide applies to every other layer of the wall. Sealant is where most “the material failed” arguments go to die, because the records show exactly which line was asked to do what.
How do joints behave where stone meets the room’s other materials?
The perimeter is where the sealant meets its widest vocabulary of neighbours: metal trims, timber reveals, glass returns, painted plaster, tile floors. Each pairing has its own movement rate and its own adhesion chemistry, and the joint detail respects both — the width sized for the pair’s relative movement, the primer question asked per face, and where a pairing is proven trouble, the geometry changed instead of the product upgraded. Stone-to-timber is the classic: timber breathes with the seasons, so the joint there is wider and more elastic than the same line against a metal trim, exactly as the stone-to-timber junction logic in our timber junction guide requires at the composition scale.
The floor junction earns its own note. Where a stone wall meets a tiled or timber floor, the sealant line takes foot-traffic cleaning and mop water alongside its movement duty — so the family is chosen for both, the geometry keeps it flush, and the renewal interval is shorter than a dry wall’s. Skirting details that let the floor finish carry the wet and the wall joint carry only movement are worth drawing, because separating the two jobs is what makes each sealant last its full life.
자주 묻는 질문
Which sealant should I use in a flexible stone shower?
Whatever the cladding system specifies for wet zones — commonly a neutral-cure silicone compatible with the membrane and the stone’s edge treatment. The manufacturer’s written confirmation is the specification, and the joint geometry and backer follow it.
How long does a sealed joint last?
Long enough to be a maintenance item rather than a risk — the actual interval depends on exposure, product and joint geometry, which is why the inspection walk sets the renewal date rather than a generic number.
Can the joint be the same colour as the stone?
Colour-matched sealants exist and work well at flush finish lines. The trade-off to know: a matched joint hides its own ageing, so the inspection needs to look closer — condition, not colour, is the renewal trigger.
Who owns the sealant programme after handover?
Whoever owns the building’s maintenance calendar, with the joint list and families transferred in the handover file. The programme is small, scheduled, and the reason the wall’s edges never become its problem.
Project Checkpoint
Specifying joints and sealants for your stone walls?
Treat the sealant as a designed, scheduled component and the wall’s edges will outlive everything around them. System-approved sealant guidance travels with the documentation on the flexible stone veneer page, and joint-design practice for adhered finishes is published by the ASTM International standards the products are tested to.