Flexible stone veneer can bend around a column, but it cannot bridge a structural movement joint. The joint has to continue through the veneer and the adhesive layer, aligned with the joint in the substrate, and it has to be sealed with a flexible sealant over a backer rod — not filled with mortar or adhesive. Most guidance on movement joints is written for rigid adhered stone, with lath, scratch coat, and shelf angles. This guide covers the flexible-sheet case: where joints are required, how to detail them, and what to inspect before the wall is closed.
Why does a flexible sheet still need movement joints?
Flexibility is not the same as movement accommodation. A flexible stone sheet bends because it is thin — 2–8 mm — and because the fiberglass mesh backing holds the material together while allowing it to follow a curve. That property lets it wrap a column or an arch without cracking. It does not let the sheet absorb the displacement of a building joint.
Once the sheet is bonded to the substrate, it moves with the substrate. If the substrate has a joint that opens or closes, the veneer has to break at the same line. If it does not, the movement concentrates in the adhesive and the veneer at the nearest point, and the result is a crack, a delamination, or a sealant failure somewhere the designer did not intend. The joint is a designed break, not a repair.
This is why a flexible sheet can handle minor substrate irregularities and curvature but cannot replace a movement joint. The product’s flexibility is a forming advantage, not a structural allowance.
Where should movement joints be located?
The joint layout belongs to the facade engineer, not the installer. The veneer joint should align with every movement joint in the substrate and with the building’s structural joints. That includes structural expansion joints, concrete or masonry control joints, floor-line and deflection joints, seismic joints, and joints between dissimilar structural systems.
Also align at changes of substrate, at the perimeter of the veneer field, and around openings and penetrations where the project details require a break. On a retrofit over existing tile, continue the existing movement joints through the new veneer; covering an existing joint with a continuous sheet is one of the most common ways to transfer a building movement into a finished wall.
Do not invent a spacing. The distance between joints depends on the substrate, the framing, the climate, and the building’s movement strategy; those are engineering decisions. If the drawings do not show a joint where the substrate has one, raise it as a request for information before installation, not after the wall is closed. The curved-wall installation guide covers the forming side of the same problem: a sheet can follow a curve, but the joint layout still has to be respected.
How do you detail the joint through the veneer and adhesive?
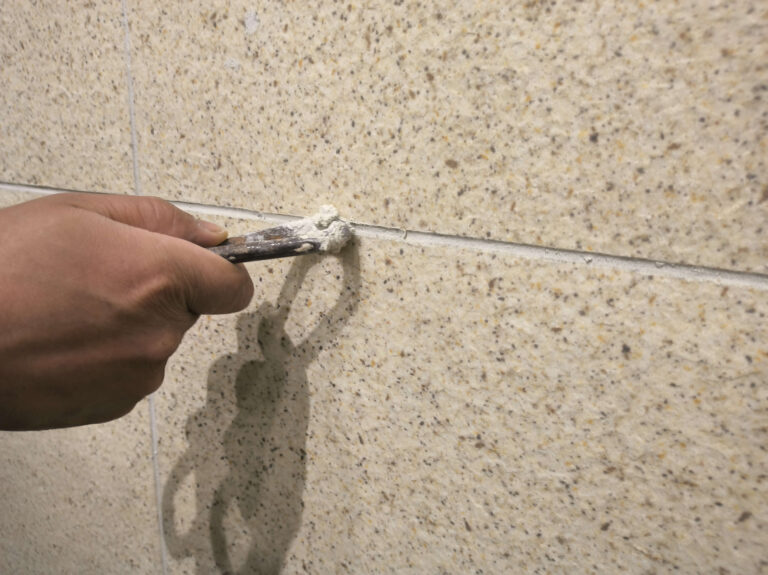
The joint must be a full-depth break through the veneer and the adhesive or render layer. It is not a groove cut into the face after the sheet is installed, and it is not a bead of sealant over a continuous sheet. The veneer, the adhesive, and any reinforcement must stop on each side of the joint, leaving a clear gap that aligns with the substrate joint.
Mask both edges before applying adhesive so that no adhesive squeezes into the joint. The joint should be clean, dry, and free of mortar, adhesive, or debris before the backer rod goes in. The backer rod controls the depth of the sealant and provides a bond break at the back; the sealant should adhere to the two sides of the joint, not to the backer rod. If the sealant is bonded on three sides, it cannot stretch and will tear when the joint moves.
The joint width and depth are project-specific. Follow the facade engineer’s detail and the sealant manufacturer’s joint design; do not scale a detail from a different project. The same detail should continue around corners and penetrations, not stop at the corner and restart on the other face.
Which sealant and backer rod should be specified?
Specify a flexible facade sealant that is compatible with the stone face and the substrate, and use a backer rod sized for the joint. A rigid mortar or grout fill is not a movement joint; it will crack as soon as the joint moves, and the crack becomes a water path. The sealant manufacturer’s data sheet should govern the joint width-to-depth ratio, the required primer, and the movement capability.
Compatibility matters in both directions. The sealant must adhere to the stone face without staining it, and it must adhere to the substrate or the joint backing. Test the adhesion in an inconspicuous area before running the full joint, especially on a dark or textured pattern where a failed bond is hard to see. Clean and dry the surfaces; dust and adhesive residue are the usual causes of a weak bond.
Treat the sealant as a serviceable component. It will need inspection and eventual replacement, like any facade sealant. Include the joint detail in the maintenance file so the next team knows what is behind the bead and how to replace it without damaging the veneer.
How do you handle joints at corners, windows, and changes of plane?
At an outside corner, the joint should continue around the corner rather than stopping at the arris. A corner detail that folds the sheet around the edge is a forming detail; it does not replace a movement joint if the substrate has one at that location. If the engineer requires a joint at the corner, break the sheet on both faces and carry the sealant around the corner in one continuous line.
At windows and penetrations, the movement joint has to integrate with the flashing and waterproofing. Sealant is not a substitute for flashing, and a joint that blocks the drainage path will trap water behind the veneer. Follow the project’s window and penetration details: the joint should allow movement and still drain.
At a change of plane or a change of substrate, the rule is the same: if the substrate changes or the engineer requires a break, the veneer breaks there. Do not bridge the change with a continuous sheet just because the sheet is flexible enough to make the turn.
What should the installer check before covering the joint?
The joint is easy to inspect before the sealant goes in and almost impossible to inspect afterward. A short checklist prevents most failures:
- The joint line is marked and aligned with the substrate joint, not offset by a few centimetres.
- No adhesive, mortar, or debris is inside the joint; the break runs through the full depth of the veneer and adhesive.
- The backer rod is at the correct depth and is continuous; there are no gaps or compressed sections.
- The sealant adheres to both sides of the joint and is tooled to the specified profile; there are no voids or bubbles.
- The joint width is consistent along its length, including around corners and penetrations.
- The joint does not block the drainage path or the flashing detail.
- Photographs are taken before the sealant and after tooling, with the batch label or location reference in the frame.
If the project has a mock-up, the movement joint should be part of it. A mock-up that shows only the face and the corner does not prove that the joint will perform; the reviewer needs to see the break, the backer rod, and the sealant profile.
What goes wrong when the joint is bridged?
A bridged joint concentrates movement at the nearest weak point. The visible result is often a crack that runs along the joint line but not exactly on it, or a delaminated strip where the adhesive has failed. Because the cause is below the surface, a cosmetic repair of the crack usually fails again at the next movement cycle.
A joint filled with mortar or grout behaves like a rigid bridge. It may look neat at handover, but it cannot accommodate movement; the mortar cracks, water enters, and the freeze-thaw or corrosion cycle starts. A sealant bonded on three sides fails differently: it stretches until it tears, and the tear is often at the bond line rather than in the middle of the bead.
A missing joint at a change of substrate produces random cracking because the movement finds its own path. By the time the crack appears, the repair is no longer a sealant replacement; it may require removing and replacing a section of veneer. That is why the joint layout is a design decision, not an installation preference.
الأسئلة الشائعة
Can flexible stone veneer span a hairline crack in the substrate?
It can accommodate minor substrate irregularities and curvature, but it is not a crack-isolation membrane. An active or structural joint must be carried through the veneer; a hairline shrinkage crack should be assessed by the engineer before it is covered.
Do I need a movement joint at every corner?
No. A corner detail is not automatically a movement joint. Put a joint where the substrate or the facade engineer requires one, and carry it around the corner if it occurs there.
What sealant should be used?
A flexible facade sealant compatible with the stone face and the substrate, applied over a backer rod. Follow the sealant manufacturer’s joint design and the project specification; do not substitute mortar or a rigid filler.
How wide should the joint be?
The width and depth are project-specific and depend on the expected movement and the sealant’s capability. Use the engineer’s detail and the sealant manufacturer’s data; do not copy a dimension from another project.
Can I cover the joint with a trim?
Only if the trim is designed to accommodate the same movement. A rigid trim that bridges the joint recreates the problem in a different material. If a trim is required, detail it as part of the movement joint, not over it.
For the forming and fixing side of the same installation, see the الملمس الحجري المرن, the installation-mistakes guide, and the installation and maintenance guides. The RMMI design guide explains the movement-joint principle for adhered stone; the flexible-sheet case follows the same principle with a different assembly.