الفجوة بين عينة ما قبل الإنتاج وما يصل فعليًّا إلى أرضية المصنع هي المكان الذي تحدث فيه معظمتركيب مصنع الحجر المرنتتقلص الجداول الزمنية. استلمت شركة سويدية معروفة في القطاع متخصصة في البناء المعياري شحنة تبلغ 1,200 متر مربع من ألواح الترافرتين المصنوعة بتقنية الطباعة ثلاثية الأبعاد خلال الربع الماضي. وكانت العينة قد اجتازت الاختبار دون أي ملاحظات. أما دفعة الإنتاج الضخم فقد شهدت انحرافًا في تفاوت اللون قدره دلتا إي 3.5 — والتي يمكن رؤيتها بالعين المجردة تحت إضاءة قاعة التجميع البالغة 4000 كلفن. توقف خط الإنتاج لمدة يومين بينما كان فريق المشتريات يتجادل مع المورد حول ما إذا كانت هذه الشحنة تقع ضمن حدود التفاوت المسموح به في الجودة وفقًا للعقد. وبحلول وقت شحن البديل، كانت الفترة المتاحة لتسليم الوحدات قد تقلصت بمقدار 11 يوم عمل. وهذا الفارق الزمني بين الموافقة على العينة وواقع الدفعة هو ما يحدد ما إذا كانت تكلفة الوحدة ستبقى ثابتة أم ستتفاقم بشكل كبير.
يواجه مصنعو الوحدات الجاهزة والمباني المجمعة معادلة مختلفة عن تلك التي يواجهها عمال التركيب في مواقع العمل. ففي موقع البناء، قد يضيع العامل ساعة كاملة في إصلاح لوح غير محاذي. أما في خط الإنتاج بالمصنع، فإن الخطأ نفسه يتكرر في 40 وحدة قبل أن يكتشفه مشرف الوردية. السرعة مهمة، لكن التكرار هو الأهم. يمكن للمركب المدرب تركيب 30 مترًا مربعًا من الحجر المرن في الساعة عندما تكون عملية تحضير الركيزة ونظام المادة اللاصقة قد تم ضبطهما بشكل مثالي. إذا تمكنت من تحقيق هذا الرقم باستمرار على مدار ثلاث نوبات عمل، فستحصل على ما يقارب 720 مترًا مربعًا يوميًا من محطة واحدة. أما إذا فشلت في تحقيق ذلك بسبب قصر مدة صلاحية المادة اللاصقة أو حدوث اختناق في رف المعالجة، فسوف ينخفض إنتاجك اليومي إلى النصف.
تفترض معظم أدلة التركيب أن اللوحة ستُثبَّت على جدار عمودي قائم بالفعل. لكن هذه النصيحة لا تنطبق في بيئة المصنع، حيث تُصنع الوحدات الجدارية في وضع أفقي على قوالب، ثم تُمال إلى الأعلى من أجل النقل. وبالتالي يتغير اختيار الركيزة: ألواح OSB وأكسيد المغنيسيوم تتفوق الألواح على الخشب الرقائقي في الأسواق التي تُعد فيها مقاومة الرطوبة عاملاً مهمًا، كما أن الهياكل المعدنية تتطلب خصائص ريولوجية مختلفة للمادة اللاصقة مقارنةً بالألواح الأسمنتية. وإذا كان مهندس الإنتاج لديك لا يزال يحدد استخدام نفس المادة اللاصقة الإنشائية التي يستخدمها طاقم العمل في الموقع في الأماكن الخارجية، فأنت تفوت على نفسك فرصة تحقيق أرباح إضافية. فالمواد اللاصقة المتخصصة المُطبقة في المصنع والمُصممة خصيصًا لمواد الطين المعدلة تتصلب بشكل أسرع، وتلتصق بقوة أكبر بشبكة الألياف الزجاجية الداعمة، وتقضي على فترة الجفاف التي تستغرق 24 ساعة والتي تعيق الإنتاجية.
قبل أن تقوم بتغيير أي محطة على خط الإنتاج الخاص بك، تأكد من ثلاثة أمور مع المورد. أولاً: هل يمكنهم ضمان اتساق اللون من دفعة إلى أخرى ضمن نطاق Delta E يبلغ 2.0 في ظل ظروف الإضاءة السائدة في مصنعك، وليس فقط في كابينة الفحص الخاصة بهم؟ ثانياً: هل سيحافظ نظام اللصق الخاص بهم على قوة الالتصاق الكاملة بعد نقل الوحدة لمسافة 400 كيلومتر على شاحنة مسطحة في درجات حرارة دون الصفر؟ ثالثًا: هل يقدمون أحجام ألواح مقطوعة مسبقًا تتوافق مع أبعاد الوحدات القياسية الخاصة بك، بحيث تعالج محطة القطع الخاصة بك بقايا القطع، وليس الألواح الكاملة؟ إذا كانت الإجابة على أي من هذه الأسئلة هي «لا»، فإن معدل التركيب في الساعة ليس الرقم الحقيقي الذي تحتاج إلى تتبعه — بل معدل إعادة العمل هو الرقم الذي يجب تتبعه.
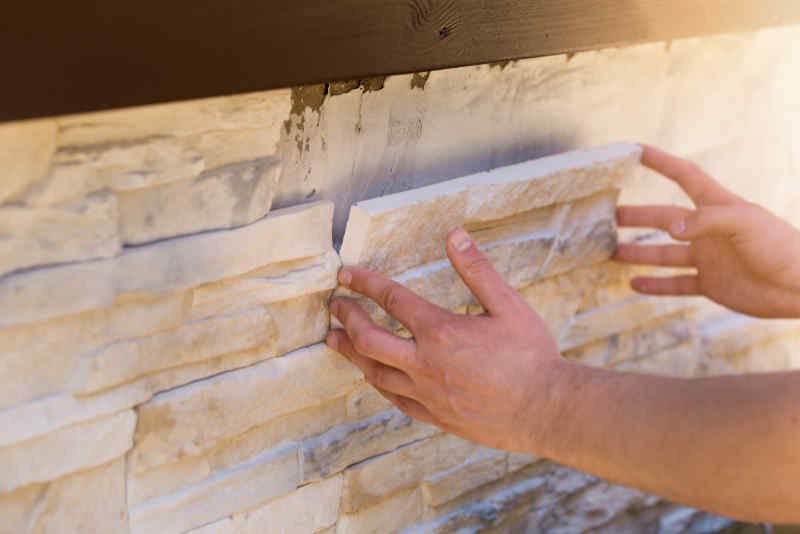
تحضير الركيزة: الخشب الرقائقي، أو ألواح OSB، أو الإطار المعدني
يُعد انتفاخ ألواح OSB بسبب الرطوبة السبب الرئيسي لمطالبات التعويض المتعلقة بانفصال الطبقات في المصانع.
مواصفات استواء الركيزة الخاصة بالحجر المرن في خط الإنتاج المصنعي أكثر صرامة مما تتصور. ففي حين أن عمليات التركيب الميدانية قد تتسامح مع انحراف يبلغ 3 ملم عند قياسه بمسطرة مستقيمة طولها 2 متر، فإن الإنتاج المعياري لا يقبل أكثر من 2 ملم. وأي انحراف يتجاوز هذا الحد يظهر بوضوح من خلال القشرة التي يتراوح سمكها بين 3 و8 ملم. وتحت الضوء الساقط بزاوية مائلة، تفسد تلك التموجات المظهر الفاخر للحجر.
الخشب الرقائقي (من الدرجة ACX أو BBO) هو الأنسب. فهو يتحرك بدرجة أقل من ألواح OSB مع التغيرات في الرطوبة, ، كما أن السطح الأملس يمنح الطبقة التمهيدية ثباتًا جيدًا. إذا أصر فريق الهندسة لديك على استخدام ألواح OSB لأسباب تتعلق بالتكلفة — وهو أمر شائع في خطوط الإنتاج الجاهزة السويدية والكندية — فاجبرهم على استخدام ألواح OSB/3 أو OSB/4 المصنفة للاستخدام في الظروف الرطبة. لقد لاحظنا انتفاخًا في حواف الألواح المصنوعة من OSB/2 القياسي في غضون 72 ساعة من تطبيق الطبقة التمهيدية، مما أدى إلى ظهور نتوء يبلغ ارتفاعه 0.8 مم يظهر من خلال القشرة الحجرية بعد المعالجة.
- إطار معدني (دعامات فولاذية): يتطلب استخدام طبقة خارجية من الألواح الأسمنتية أو ألواح أكسيد المغنيسيوم. يُحظر لصق المادة اللاصقة مباشرةً على الفولاذ — حيث يمكن أن يتجاوز الفرق في التمدد الحراري قدرة الذاكرة المرنة للوحة، مما يؤدي إلى ارتفاع الحواف.
- الفحص قبل التسوية: استخدم مسطرة ألومنيوم بطول 2 متر. ضع علامات على أي تجاويف يزيد عمقها عن 2 مم. املأها بمركب تسوية معدل بالبوليمر حتى عمق 5 مم؛ أما التجاويف الأعمق من ذلك فتتطلب استبدال اللوح.
- متطلبات الدورة التمهيدية: قم بتطبيق طبقة أولية من الإيبوكسي أو الأكريليك الخالية من المذيبات بمعدل 120-150 غ/م². فهذا يعمل على سد المسام في الأسطح المسامية (OSB) وإزالة الغبار عن الخشب الرقائقي الذي تم صقله بالرمل. فالغبار هو العامل الخفي الذي يضعف الترابط، والذي غالبًا ما يغفل عنه قسم ضمان الجودة في المصنع.
أجرت إحدى شركات تصنيع الوحدات المعيارية في بولندا تجربة شملت 200 وحدة باستخدام ألواح OSB/3 بسماكة 19 مم، والتي اجتازت اختبار الاستواء الداخلي الخاص بالشركة. وتجاهلت الشركة استخدام الطبقة التمهيدية في نصف الوحدات لتوفير 1.2 ساعة لكل وحدة. وبعد دورة معالجة استمرت 14 يومًا، أظهرت الألواح التي لم تُطلى بطبقة التمهيدي تجعدًا في الحواف بمقدار 4 مم في 11% من الوحدات. وقد قضت تكلفة إعادة العمل على الوفورات التي تحققت في تكلفة المواد اللاصقة على مدى ستة أشهر. طبقة التمهيدي ليست اختيارية — إنها أرخص ضمان في هذه العملية.
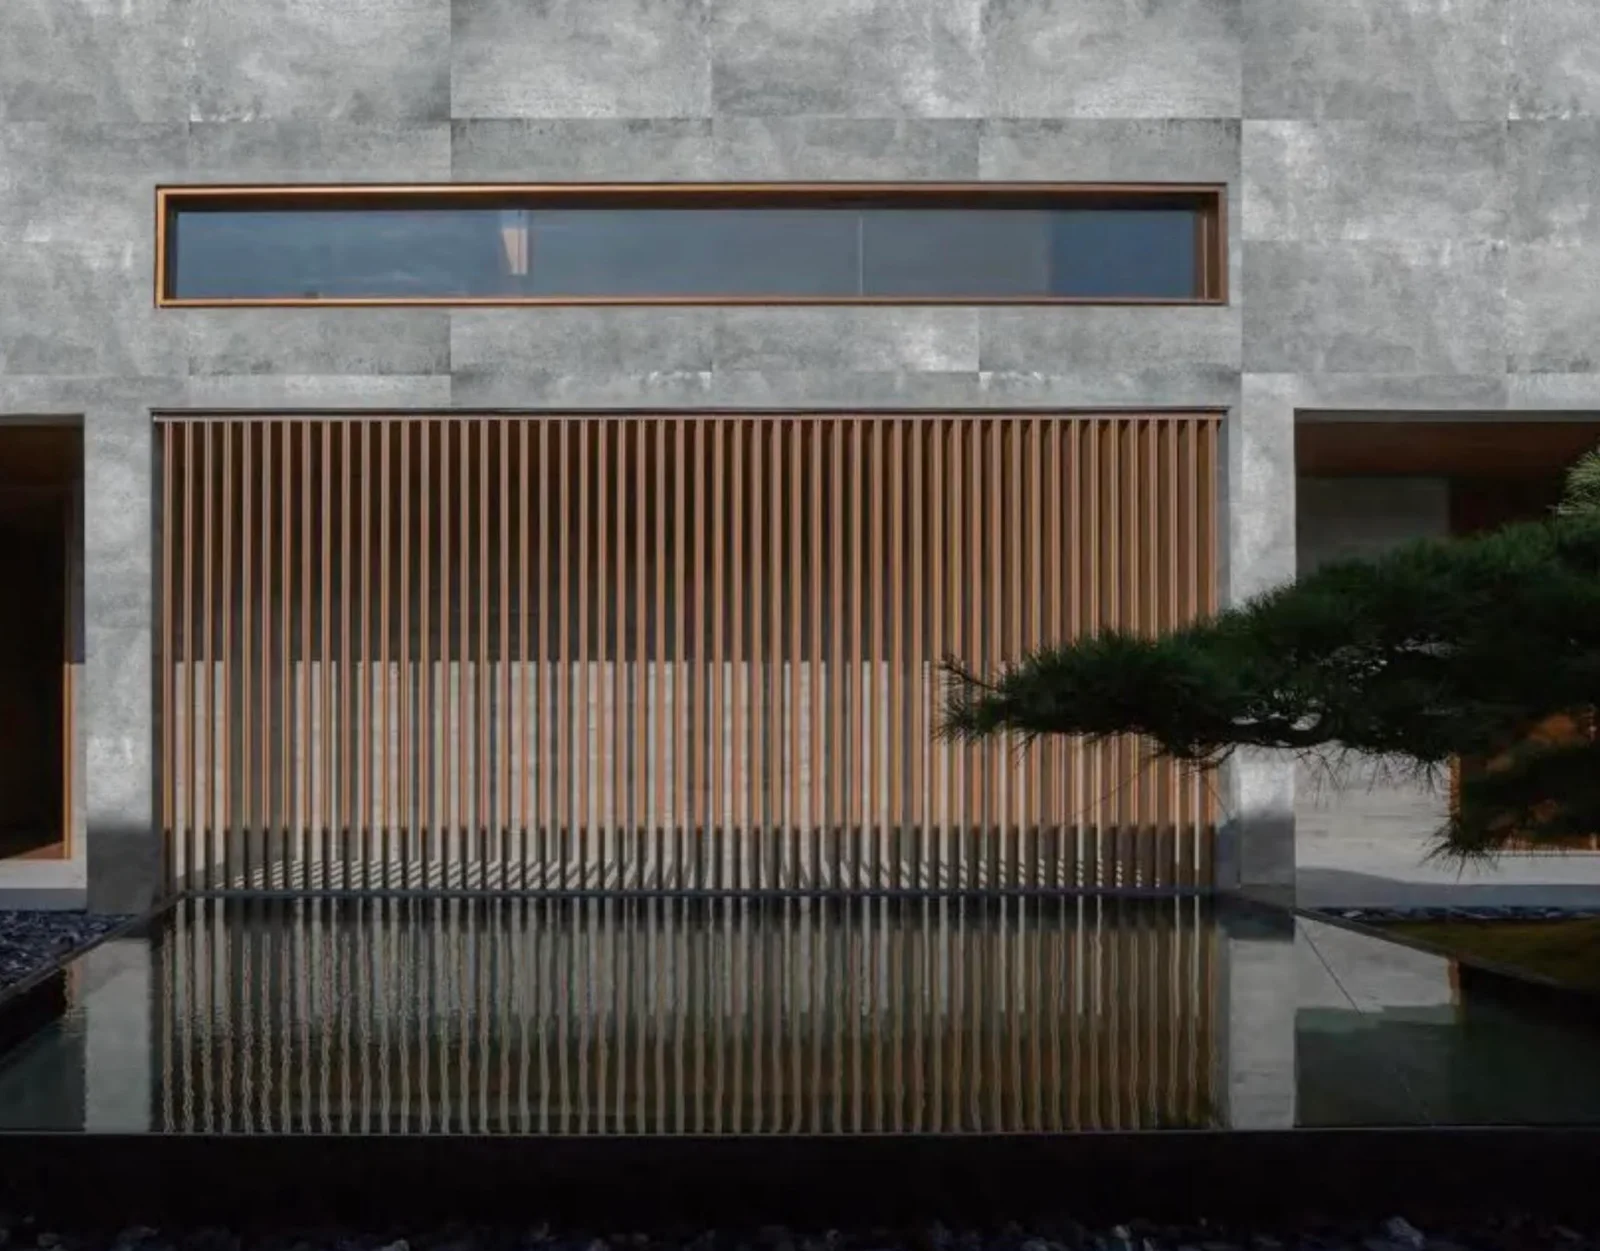
اختيار المادة اللاصقة المناسبة (الغراء المتخصص من JMS Decor)
تجاهلوا الأسطورة القائلة بأن ‘أي مادة لاصقة للبناء تفي بالغرض’ — فسرعة الإنتاج في المصنع تتطلب تركيبة كيميائية معدلة بالبوليمرات.
تكرر معظم أدلة التركيب نفس النصيحة السطحية: احصل على عبوة من مادة اللصق الخاصة بالبلاط وابدأ العمل. لقد قمت بتدقيق خطوط الإنتاج المعيارية في ستة بلدان، ووجدت أن هذا النهج يؤدي إلى إعادة العمل، مما يستنزف ميزانية العمالة الخاصة بك. تتميز الألواح الحجرية المرنة — المصنوعة من الطين المعدل، ومستحلب الراتنج، وشبكة الألياف الزجاجية — بمسامية تقترب من الصفر. تتصلب المواد اللاصقة الأسمنتية القياسية عن طريق الترطيب، وليس عن طريق الارتباط الكيميائي. وعلى الأسطح غير الماصة مثل ألواح OSB أو الهياكل المعدنية، تتشكل طبقة خارجية عليها، مما يترك قوة تثبيت ميكانيكية ضعيفة. وبعد التعرض للاهتزاز أثناء النقل، ترتفع الحواف. لقد شاهدت انفصال طبقات في منتج 12% في غضون 48 ساعة من شحن الوحدات النمطية، وذلك عند استخدام مادة لاصقة غير مناسبة على الألواح مقاس 1200×600 مم.
المتطلب الحقيقي لا يقتصر على مجرد ‘غراء قوي’. بل هو مادة لاصقة مصممة خصيصًا لتتوافق مع قيود خط الإنتاج: قوة تثبيت أولية عالية للتطبيق الرأسي دون الحاجة إلى دعامات، ومرونة تتناسب مع مرونة اللوحة نفسها (نصف قطر انحناء أقل من 5 مم)، ووقت عمل يتوافق مع دورة محطتك. تم تصميم الغراء المتخصص من JMS Decor خصيصًا لهذه المادة — فهو ليس مجرد مادة لاصقة إنشائية أعيد تسميتها. يتم تثبيت اللوح بالحجم الكامل على الفور بفضل قوة الالتصاق الفورية، مما يتيح للعمال الانتقال إلى القطعة التالية دون الحاجة إلى دعامات مؤقتة. بالنسبة لنظام الجدران المعيارية، هذا هو الفارق بين إنتاج 8 ألواح في الساعة و30 مترًا مربعًا لكل محطة لكل عامل.
- الكيمياء: معدّل بالبوليمر، ولا يحدث فيه تبلور الأسمنت. يلتصق بالجزء الخلفي الغني بالراتنج للحجر المرن عن طريق الترابط الكيميائي.
- ساعات العمل: 20–25 دقيقة عند درجة حرارة 23 درجة مئوية، مما يتيح للعاملين في خط الإنتاج فترة زمنية مريحة. ويضمن التطبيق باستخدام مجرفة مسننة عدم وجود بقع جافة.
- نطاق التغطية: يغطي دلو واحد سعة 20 كجم مساحة تتراوح بين 15 و18 مترًا مربعًا تقريبًا عند تطبيقه باستخدام مجرفة مسننة بحجم 3×3 ملم. احسب الاستهلاك بمعدل 1.2–1.4 كجم/م².
- الاستيلاء الأخضر: 180 كيلو باسكال في غضون 10 دقائق — لا حاجة إلى مشابك أو دعامات للألواح الكبيرة مقاس 1200×2900 مم التي يصل وزنها إلى 14.5 كجم.
بالنسبة للمتاجر التي تعمل بنظام الوحدات النمطية وتستخدم ركائز متنوعة — مثل حواف الخشب الرقائقي، والإطارات المعدنية، والكسوة الجبسية — يظل أداء المادة اللاصقة ثابتًا مع جميع هذه الركائز الثلاثة. وهذا يلغي الحاجة إلى التبديل بين المواد. أما مادة الإحكام المرافقة، وهي أيضًا من خط إنتاج JMS Decor، فتمنح وصلة ذات تشطيب مصنعي تتجاوز معدل امتصاص الماء 0.5%، بما يتوافق مع مواصفات الألواح. وبالجمع بينهما، يقلل النظام من مشاكل التشويش بعد التركيب إلى معدل عيوب أقل من 2% وفقًا لتقارير تدقيق الإنتاج لدينا.
إذا كنت تقارن التكلفة الإجمالية لهذا اللاصق المتخصص مع الملاط المعدل العادي، فقم بحساب تكلفة إعادة العمل. تستغرق إزالة لوحة معيبة من جدار معياري في المصنع 25 دقيقة لكل قطعة، بالإضافة إلى تكلفة استبدال اللوحة. ويقل فرق سعر المواد عن $1.50 لكل متر مربع. وعملية إعادة العمل الواحدة تلغي الوفورات المحققة من تركيب 200 متر مربع. فالمواصفات ليست هي المكان الذي تحقق فيه الهامش المالي — بل هي المكان الذي تحمي فيه إنتاجيتك.
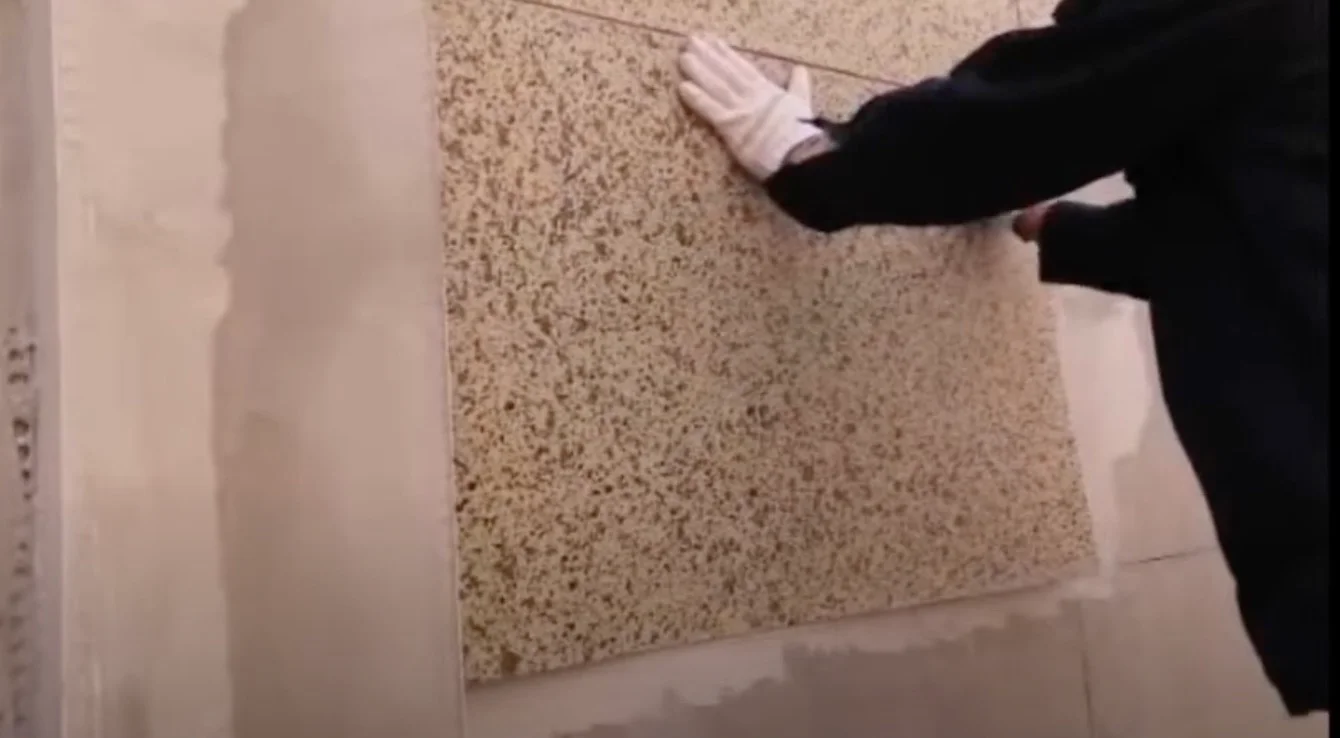
قطع وتشكيل الألواح لتناسب الزوايا والمنحنيات
معظم مديري المصانع يبالغون في تعقيد الزوايا.
إليكم ما يثبت فعاليته فعليًّا على خط الإنتاج. يمكن لسكين متعدد الاستخدامات قياسي مخصص للأعمال الشاقة، مزود بشفرات قابلة للانفصال مقسمة إلى أجزاء، قطع لوح مقاس 1200 × 600 مم في أقل من 15 ثانية. ما عليك سوى إحداث شق على الوجه الأمامي للوح على طول حافة مستقيمة، ثم سحب الشفرة للخلف — لتنقطع شبكة الألياف الزجاجية بشكل نظيف. من أجل المنعطفات الحادة, ، مثل تغليف عمود قطره 150 مم، فلن تحتاج حتى إلى القص المسبق. فالمادة تنحني بزاوية 90 درجة دون تسخين، مباشرةً من المنصة النقالة. وهذا ليس مجرد كلام تسويقي. فالمواصفات الداخلية للإنتاج تؤكد أن المادة تتحمل نصف قطر انحناء لا يقل عن 15 ضعف سمكها. وبسمك 3 مم، فإن نصف قطر الانحناء يبلغ 45 مم. حتى كوب القهوة له نصف قطر أكبر من ذلك.
- الأداة: سكين «أولفا» 18 مم المخصص للأعمال الشاقة أو ما يعادله. شفرة قابلة للسحب، وليست ثابتة. ستستهلك شفرة واحدة في المتوسط لكل 50 مترًا طوليًا من القطع.
- القصات المستقيمة: قم بعمل شق واحد بضغط متوسط على طول مسطرة فولاذية. تجنب التحريك ذهابًا وإيابًا — قم بتمريرة واحدة نظيفة، ثم اقطع. يبلغ انحراف الحافة أقل من 0.5 مم عندما يكون المشغل مدربًا.
- الزوايا الداخلية (حواف النوافذ): اقطع قطعتين منفصلتين بزاوية 45 درجة. قم بربطهما معًا طرفًا إلى طرف. سيتم تغطية الوصلة لاحقًا بخط من مادة مانعة للتسرب. لا تحاول عمل شق في قطعة واحدة — فتركيز الإجهاد الداخلي سيؤدي إلى تمزق الشبكة في غضون 6 أشهر.
- الزوايا الخارجية (التفاف الأعمدة): لف اللوحة حول الزاوية دون قصها. استخدم مسدس الهواء الساخن على درجة حرارة 80 درجة مئوية لمدة 20 ثانية على الأسطح المزخرفة التي يزيد سمكها عن 5 مم لتليين البوليمر ومنع حدوث تشققات دقيقة عند الانحناء.
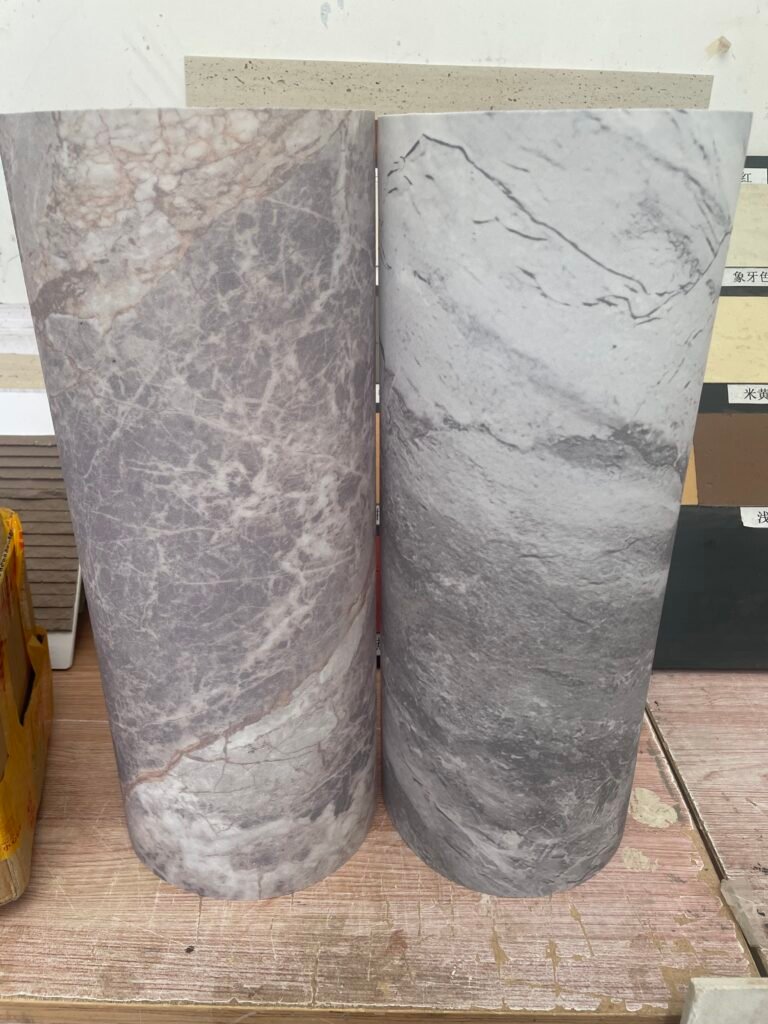
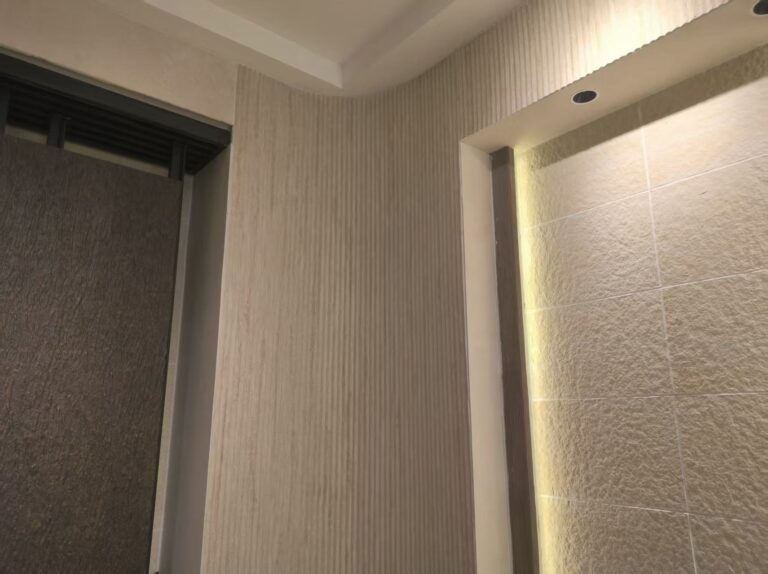
بالنسبة للأسطح المنحنية في الوحدات المعيارية — مثل مكاتب الاستقبال الدائرية أو وحدات الأسقف ذات القباب الأسطوانية — هناك طريقتان متاحتان. بالنسبة للمنحنيات الخفيفة التي يزيد نصف قطرها عن 300 مم، تتكيف اللوحة القياسية بسماكة 3 مم دون الحاجة إلى أي معالجة. قم بتطبيق المادة اللاصقة باستخدام مجرفة مسننة، ثم اضغط على اللوحة لتثبيتها في مكانها، واستمر في الضغط لمدة 60 ثانية. بالنسبة لنصف القطر الضيق الذي يقل عن 300 مم، حدد النوع الحجري الشفاف بسماكة 2 مم. يزن هذا النوع 4.2 كجم/م² فقط ويمكنه تغطية عمود بنصف قطر 100 مم دون الحاجة إلى التسخين. وقد تمكن أحد الفنيين المدربين الذين قمت بتوقيت عملهم من تغطية 8 أمتار طولية من الأعمدة المنحنية في الساعة باستخدام هذه المادة.
يصبح القطع المسبق أمرًا ضروريًا عند العمل مع الألواح الكبيرة ذات أبعاد 1200 × 2900 مم، وذلك لإنشاء واجهات كبيرة متصلة دون انقطاع. لا يمكنك قص لوح بطول 2900 مم على منضدة عمل قياسية. استثمر في طاولة قص آلية مزودة بشفرة هوائية — وليس منشارًا. تتأرجح الشفرة الهوائية بتردد عالٍ ولكنها لا تولد حرارة. لا يذوب، ولا يتلف نسيج الشبكة. يمكن لطاولة واحدة من هذا النوع معالجة 300 متر مربع من الألواح المقطوعة مسبقًا في كل نوبة عمل، لتزويد 3 محطات تركيب على طول خط الإنتاج. بالنسبة لمصنع ينتج 10 وحدات معيارية أسبوعيًا، فإن هذه المحطة الواحدة تغني عن موظف بدوام كامل في قسم القطع.
التفاوت المسموح به في الجودة في مرحلة القطع هو المرحلة التي يمكنك فيها اكتشاف المشاكل قبل وصولها إلى الفحص النهائي. يجب فحص كل حافة مقطوعة تحت ضوء مائل للتأكد من عدم انفصال الشبكة. إذا لاحظت انفصال الألياف الزجاجية عن طبقة الحجر بمقدار يزيد عن 1 مم، فقم برفض اللوحة وتحقق من حالة الشفرة. تتسبب الشفرات غير الحادة في 90% من عيوب الحواف. وهذا ليس عيبًا في المواد — بل هو مشكلة تتعلق بصيانة الأدوات. قم بتتبع عمليات تغيير الشفرات التي يقوم بها كل مشغل في سجل بسيط. ستخبرك البيانات بالضبط بمن يحتاج إلى إعادة تدريب.
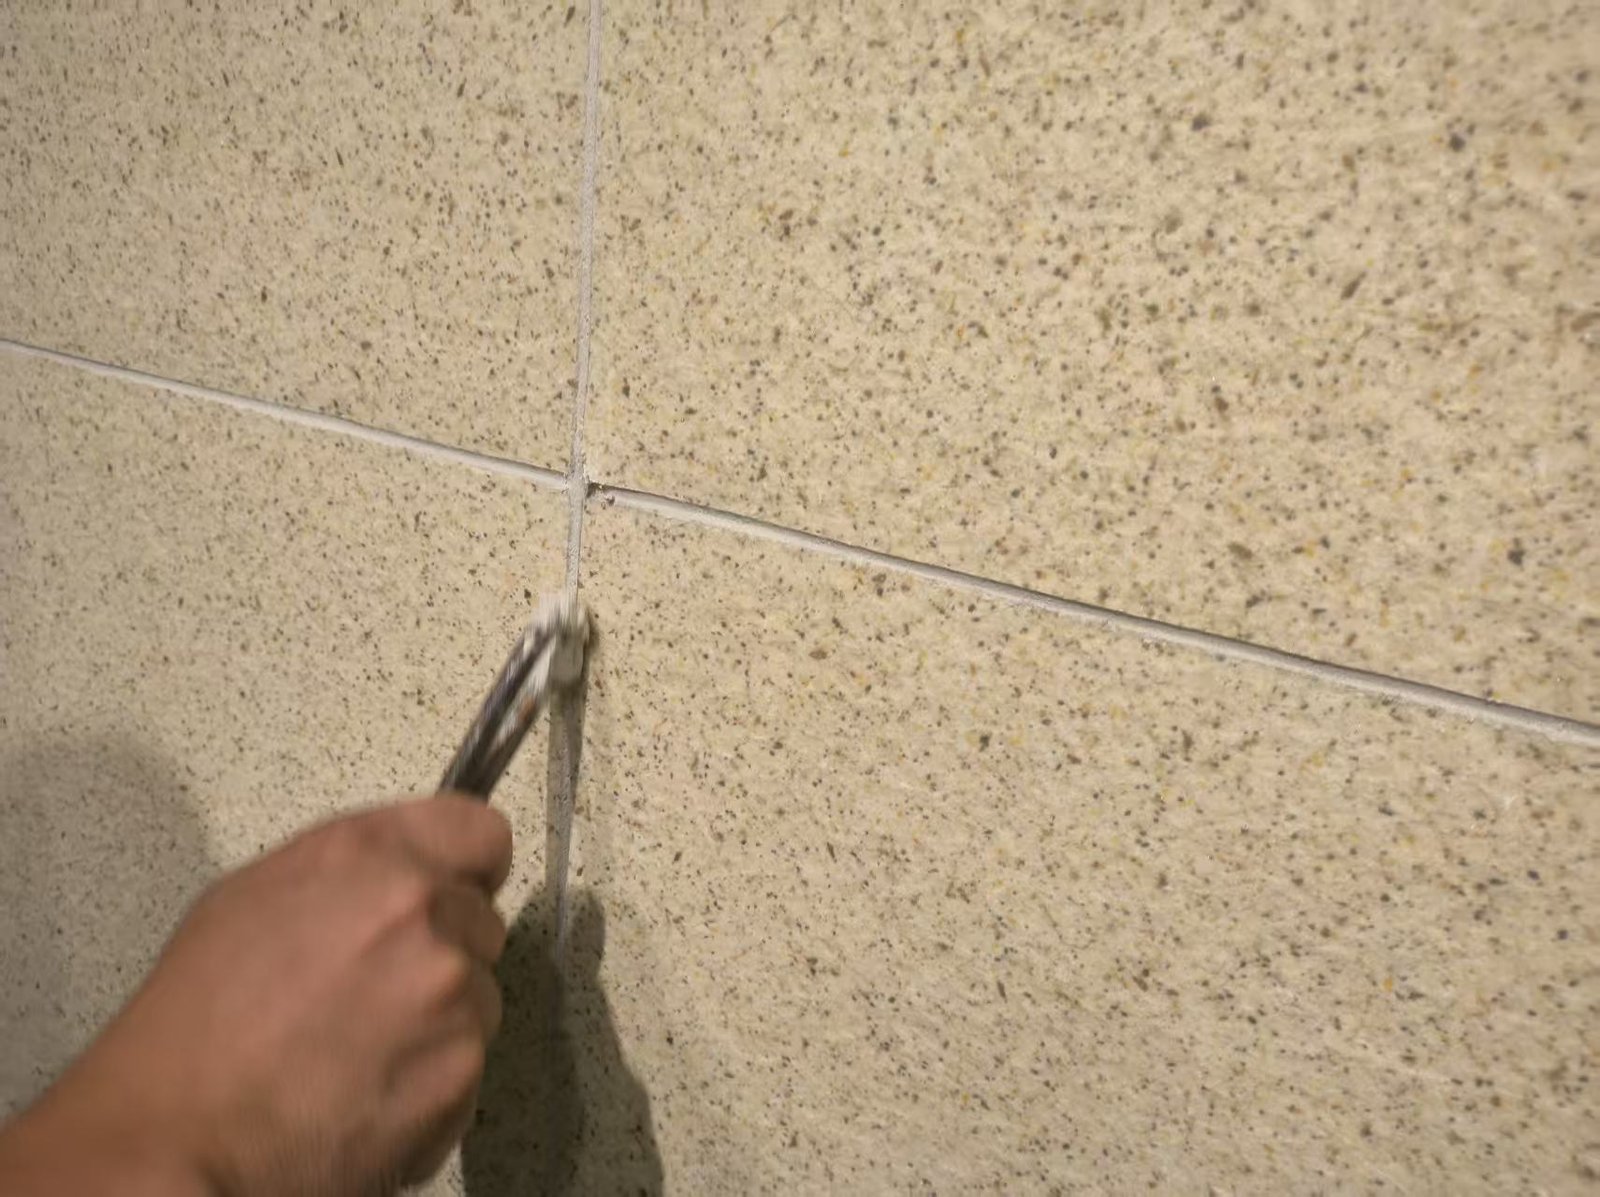
طرق التثبيت: المشابك مقابل اللصق الكامل
في خط الإنتاج بالمصنع، يُعد اللصق الكامل الطريقة الوحيدة التي تمنع انفصال طبقات الألواح أثناء النقل.
تقوم شركات البناء المعياري بشحن الجدران، وليس المواد فحسب. فكل لوح تقوم بتثبيته على الركيزة سوف يهتز وينثني ويلتف أثناء نقله على شاحنة مسطحة تقطع مسافة 800 ميل إلى موقع البناء. نظام المشابك الميكانيكية — من النوع الذي تستخدمه لأرضيات WPC أو الكسوة المقاومة للمطر — يخلق أحمالًا نقطية. على لوح حجري مرن بسمك 3 مم، تصبح تلك الأحمال النقطية نقاط تمزق خلال أول 50 ميلًا. لقد رأيت دفعة كاملة من الألواح ذات نسيج الترافرتين مقاس 1200 × 600 مم تصل إلى موقع العمل وهي بها شقوق دقيقة تشع من كل فتحة مسمار. الحل ليس في استخدام مشابك أفضل. الحل هو التلامس الكامل باللاصق، وإليك السبب.
تعمل الألواح الحجرية المرنة لأن شبكة التسليح المصنوعة من الألياف الزجاجية توزع الضغط على كامل مساحة اللوح. وعند استخدام مشبك أو نظام المسمار والغسالة، فإنك تركز كل طاقة الاهتزاز في حلقة قطرها 10 مم حول كل عنصر تثبيت. ولا تستطيع الطبقة الأسمنتية المعدلة بالبوليمر تحمل ذلك. أما تطبيق المادة اللاصقة بالكامل — بتمريرها بالمالج على كامل الجزء الخلفي للوحة — فيخلق رابطة متجانسة. فتتحرك اللوحة والمادة اللاصقة والسطح الأساسي كوحدة واحدة. تزن اللوحة القياسية مقاس 1200 × 600 مم المثبتة بهذه الطريقة حوالي 3.5 كجم فقط بعد التركيب، لكنها تتصرف كعنصر صلب واحد أثناء النقل.
- تغطية لاصقة كاملة: يُستخدم لاصق الحجر المرن المتخصص باستخدام مجرفة مسننة بسمك 4 مم. تُدهن كل لوحة من الخلف بطبقة من اللاصق لتغطية 100% — دون ترك أي فراغات. يستغرق طلاء لوحة واحدة مقاس 1200 × 600 مم وتثبيتها على الركيزة حوالي 90 ثانية. وبوزن يبلغ 3.5 كجم لكل لوح، يمكن لعامل واحد حمل وتغطية وتركيب 30 مترًا مربعًا في الساعة على منصة إنتاج مسطحة.
- المشابك أو أدوات التثبيت الميكانيكية: غير متوافق بشكل عام مع الحجر المرن الذي يقل سمكه عن 8 مم. إذا كانت مواصفات المشروع تفرض التثبيت الميكانيكي — حيث تنص بعض القوانين التجارية في الإمارات العربية المتحدة والمملكة العربية السعودية على ضرورة وجود تثبيت ميكانيكي ظاهر للكسوة التي يزيد ارتفاعها عن 3 أمتار — فإن النهج الوحيد القابل للتطبيق هو النهج الهجين: ربط لاصق كامل بالإضافة إلى قناة حافة غير اختراقية في الجزء العلوي من كل لوح. لا تقم أبدًا بالثقب عبر جسم اللوحة نفسها. فطبقة الشبكة، بمجرد تعرضها للتلف، لن تتمكن من إعادة توزيع الحمل، مما سيؤدي إلى انتشار الشقوق في غضون 6 إلى 12 شهرًا من التعرض للدورات الحرارية.
المادة اللاصقة نفسها أهم من الطريقة المستخدمة. فالملاط الرقيق القياسي يجف ليصبح صلبًا للغاية. وتتوسع اللوحة وتتقلص بمعدل يبلغ تقريبًا 0.02 ملم لكل متر لكل درجة مئوية. ينقل اللاصق الصلب هذه الحركة مباشرةً إلى الطبقة السطحية للحجر، مما يتسبب في حدوث شقوق دقيقة لا يمكنك رؤيتها إلا بعد أول دورة مطرية. أما اللاصق الخاص بمصنع JMS Decor فيحتوي على مُعدِّل بوليمر يتيح مرونة جانبية تبلغ 1.2 مم لكل متر دون أن ينفصل اللاصق عن السطح. بالنسبة لمقاولي البناء المعياري، يعني هذا أن اللوحة تتحمل سلسلة العمليات من القالب إلى الشاحنة إلى الرافعة إلى الأساس دون مطالبات بالضمان.
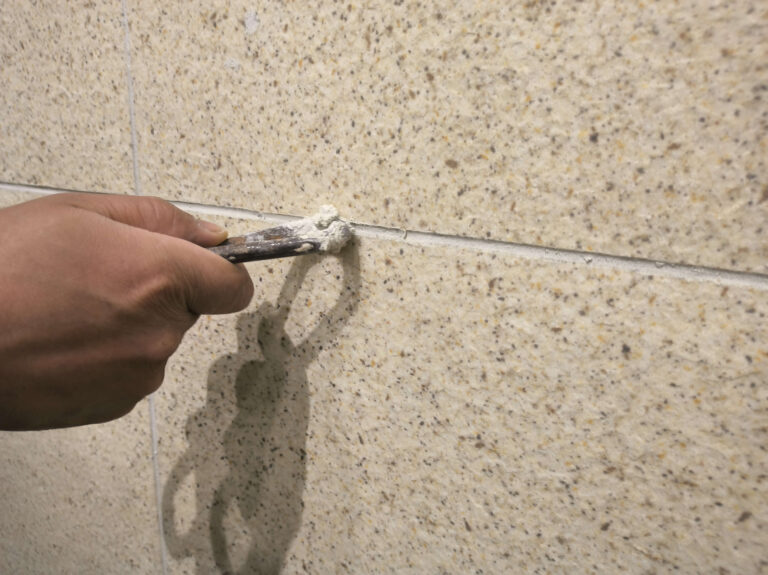
يُعد إحكام إغلاق الحواف الخطوة التي يتجاهلها معظم مصانع الإنتاج المعياري — ثم يندمون عليها لاحقًا. بعد أن يجف اللاصق وقبل أن تغادر اللوحة المصنع، قم بتطبيق مادة مانعة للتسرب مناسبة على الحواف الأربعة جميعها. وهذا يمنع تسرب الرطوبة أثناء التخزين في الهواء الطلق بموقع البناء. فاللوحة التي تغادر مصنعك جافة، لكنها تبقى في الموقع لمدة 10 أيام تحت المطر، سوف تمتص الماء من حواف القطع. امتصاص الماء فبالنسبة للحجر المرن، يقل معدل التسرب عن 0.5% عند السطح الأمامي، لكن الحافة غير المُحكمة الإغلاق تُشكل مسارًا شعريًّا مفتوحًا. ويستغرق تطبيق مادة الإغلاق 15 ثانية لكل متر طولي، ويقضي على أكثر الشكاوى شيوعًا بعد التركيب، ألا وهي: انحناء الحواف.
بالنسبة لأجزاء الجدران المعيارية التي سيتم رفعها بالرافعة لتركيبها في مكانها، أضف خطوة إضافية بعد معالجة المادة اللاصقة: قم بوضع خط من مادة لاصقة البولي يوريثان المرنة المخصصة للأعمال الإنشائية على طول محيط السطح الأساسي قبل تثبيت اللوحة. وهذا يؤدي إلى مخمد الاهتزازات الثانوي. في جزء من الجدار يبلغ ارتفاعه 2.9 متر تم رفعه بواسطة رافعة برجية، يمكن أن يصل الانحراف الناتج عن التذبذب في الجزء العلوي من اللوح إلى 3-5 ملم. وتقوم الحافة المحيطة بامتصاص هذه الحركة دون نقلها إلى سطح الحجر.
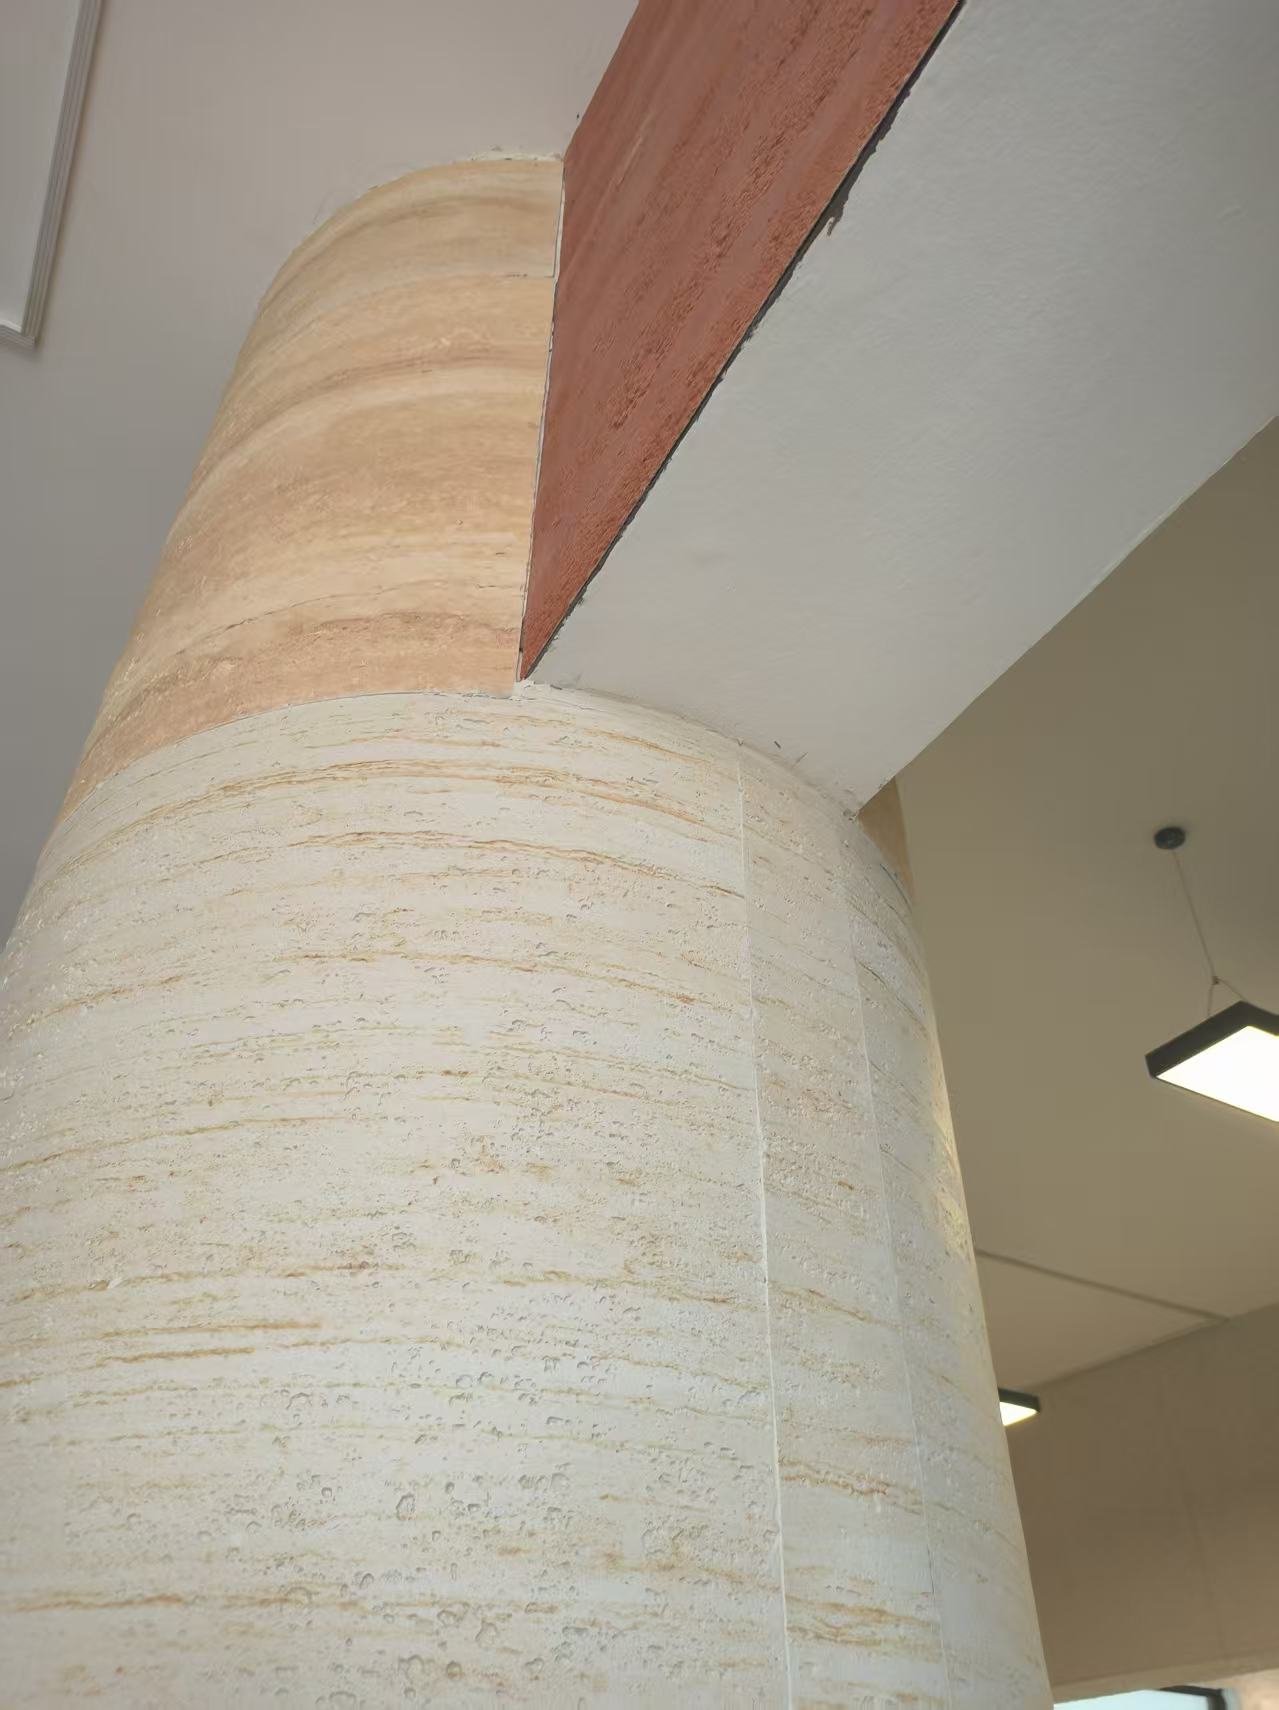
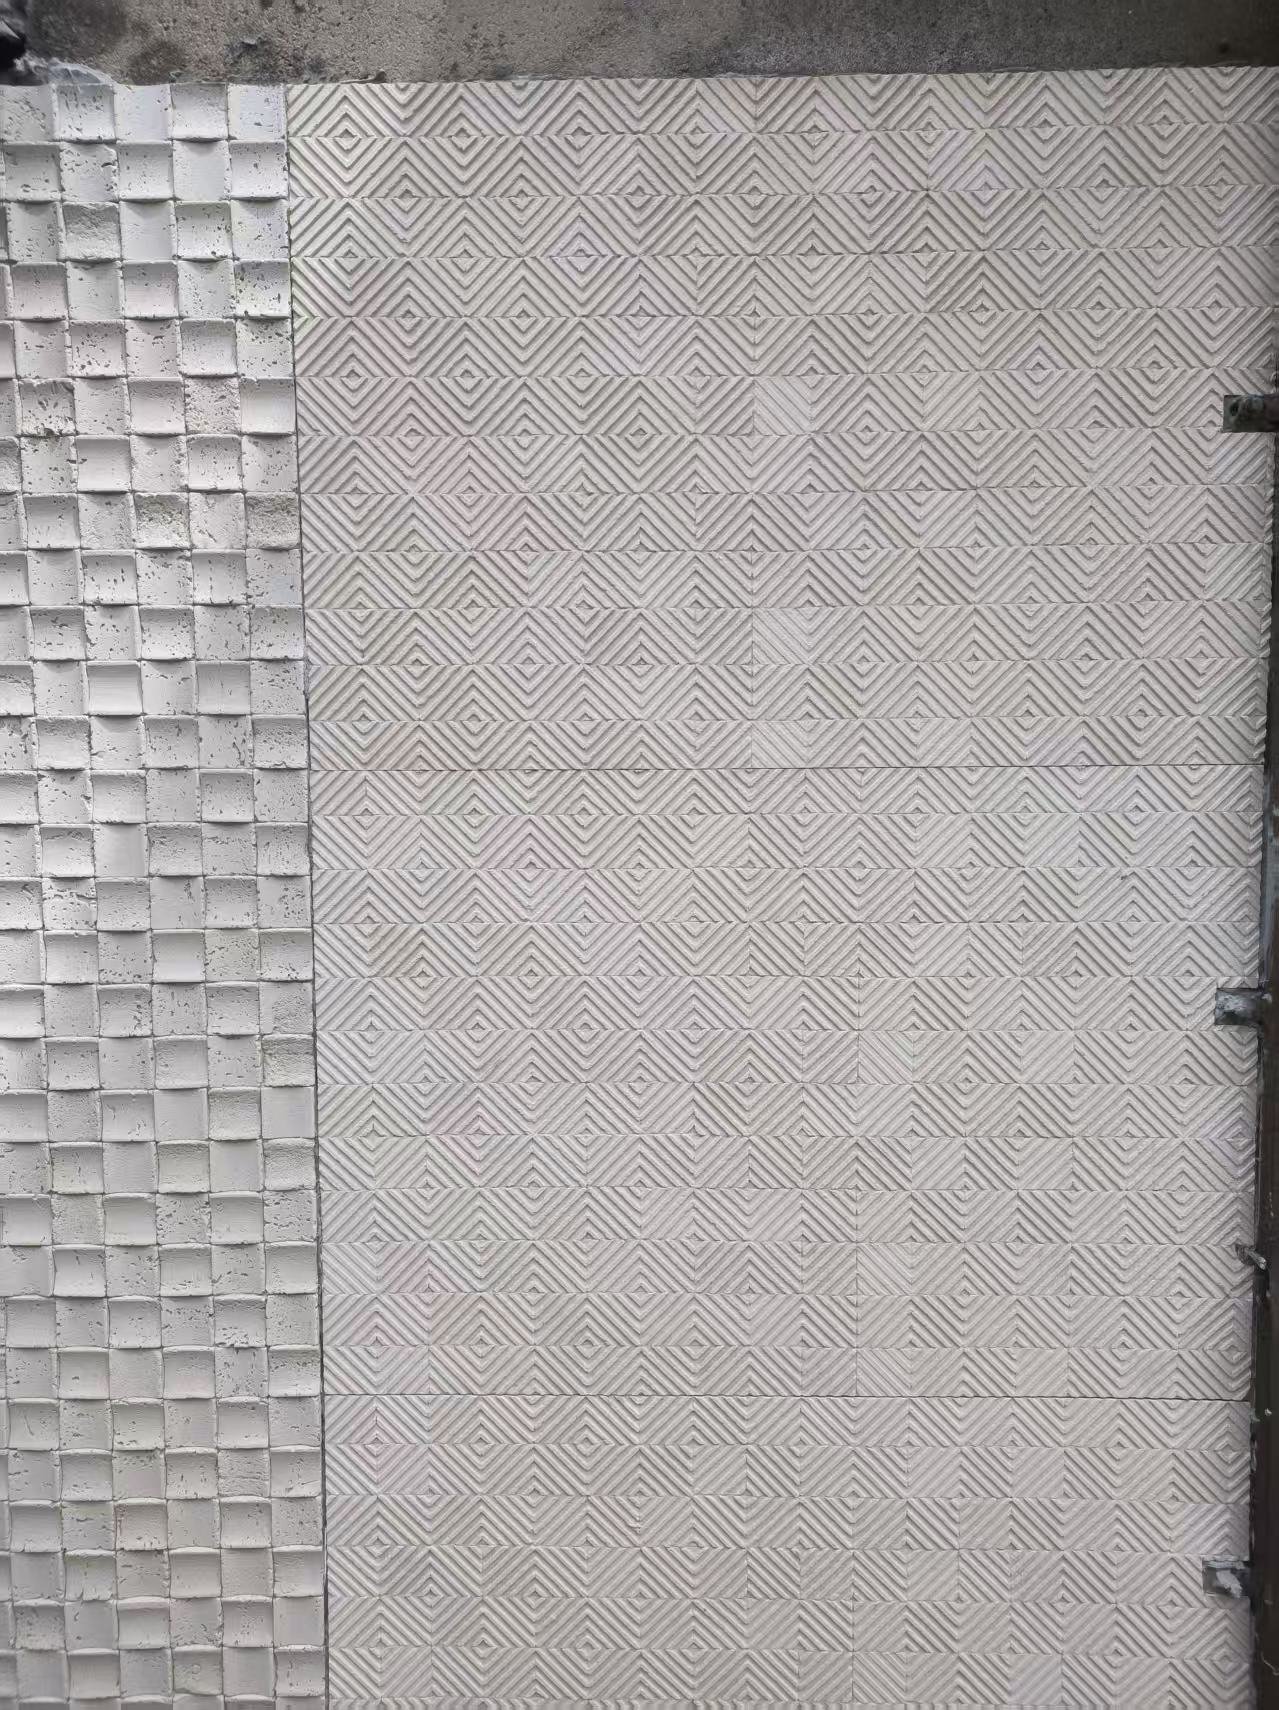
قائمة مراجعة لمراقبة الجودة
في حالة عدم إغلاق بوابة مراقبة الجودة، فإن تخطي عملية فحص واحدة يكفي لإبطال دورة إنتاج بأكملها.
في مجال التكامل الصناعي، لا تعني ‘مراقبة الجودة’ إجراء الفحص في نهاية خط الإنتاج والأمل في الحصول على دفعة خالية من العيوب. بل تعني إيقاف العيب قبل أن يتفشى في 200 وحدة. بالنسبة للألواح الحجرية المرنة، فإن المادة نفسها متسامحة — فهي لا تتحطم أثناء النقل مثل الألواح الحجرية الملبدة — لكن عملية التركيب تنطوي على نقاط فشل خاصة بها. تستهدف قائمة مراجعة مراقبة الجودة أدناه بالضبط النقاط التي يتعثر فيها معظم مصنعي الوحدات النمطية: تباين لون الدفعة، وفجوات في الترابط اللاصق، والتصلب المناسب للنقل.
ابدأ بفحص المواد الواردة. اسحب 5% من الألواح من كل منصة نقالة وضعها تحت نفس الإضاءة الموجودة في قاعة الإنتاج. قارنها بالعينة المعتمدة قبل الإنتاج — لا تقارنها بصورة ملتقطة بالهاتف، ولا تعتمد على ذاكرتك. التفاوت المسموح به لـ التباين بين دفعات الصبغ يكون التباعد بين صفوف الحجر المرن أضيق منه في بلاط السيراميك، لأن سطحه مصنوع من مواد معدنية، كما أن الطبقة الأساسية تمتص الرطوبة بشكل مختلف باختلاف مستويات الرطوبة. تحافظ شركة JMS Decor على معدل عيوب أقل من 1% عبر جميع الشحنات، ولكن حتى هذا المعدل البالغ 1% يمكن أن يتركز في صندوق واحد إذا لم يتم قص حافة الدفعة.
- 1. مطابقة لون السطح: ضع 3 ألواح عشوائية من الدفعة بجوار العينة المُوقَّعة تحت إضاءة 4000 كلفن. يرفض إذا أظهرت أي لوحة واحدة تغيرًا في قيمة Delta E يمكن رؤيته بالعين المجردة على مسافة 1.2 متر. هذا هو السبب #1 لرفض الموقع في مشاريع الفنادق الجاهزة والمباني السكنية متعددة العائلات — فوجود جدار يحتوي على لوحة واحدة تبدو أبرد أو أدفأ قليلاً يفسد المظهر الحجري المتناسق.
- 2. التباين في سماكة الحواف: قم بقياس الزوايا الأربع لكل لوح كبير الحجم كل 20 لوحًا (1200 × 600 مم أو 1200 × 2900 مم). تسمح المواصفات بتفاوت في السماكة يتراوح بين 3 مم و8 مم، اعتمادًا على شكل النسيج. تتميز أنماط الترافرتين بتموجات طبيعية — وهذا هو المقصود من التصميم. لكن وجود انحناء متسق على طول حافة واحدة يعني أن القالب لم ينفصل بشكل متساوٍ، ولن تستقر اللوحة بشكل مستوٍ على طبقة أساسية من الخشب الرقائقي المقطوع في المصنع. ضع علامة على أي لوحة يتجاوز انخفاضها 1.5 مم على عرض 600 مم لإعادة معالجتها.
- 3. سلامة الطبقة الداعمة المصنوعة من الألياف الزجاجية: قم بثني اللوحة بحيث يكون نصف قطرها 300 مم (ما يعادل تقريبًا انحناء غلاف العمود القياسي). إذا انفصلت الشبكة المدمجة أو سمع صوت طقطقة، فهذا يعني أن طبقة التسليح لم تلتصق خلال مرحلة المعالجة. وستتعطل هذه اللوحة تحت تأثير التمدد الحراري في جدار معياري مواجه للغرب في غضون 3 سنوات. إن وجود لوحة واحدة معيبة في دفعة مكونة من 100 لوحة يعني أن هناك 10 لوحات أخرى مشكوك في جودتها — لذا يجب عزل الدفعة الإنتاجية بأكملها عن تلك المنصة النقالة.
- 4. فحص تغطية المادة اللاصقة: بالنسبة لطرق التطبيق ذات اللصق الكامل، قم بإجراء اختبار التقشير على لوح واحد من كل 50 لوحًا مُركَّبًا. ارفع إحدى الزوايا بعد التصلب الأولي (حوالي 15 دقيقة باستخدام لاصق البوليمر المتخصص). يجب أن يُظهر نمط التغطية على ظهر اللوحة نقلًا لا يقل عن 85% — تشير الفراغات الأكبر من عملة معدنية قطرها 20 مم إلى ضغط مجرفة غير كافٍ أو إلى أن المادة اللاصقة قد تشكلت عليها طبقة خارجية قبل الضغط. هذا هو الفرق بين اللوحة التي تصمد أمام رحلة شاحنة بطول 2,400 كم على منصة مسطحة وتلك التي تنفصل عند التسليم.
- 5. سلامة أدوات التثبيت والمشابك: في حالة استخدام نظام هجين يجمع بين المشابك والمواد اللاصقة للوحات الكبيرة، قم بإجراء اختبار الشد على مشبك واحد من كل 20 مشبكًا على ركيزة نموذجية قبل أن تدخل الوحدة مرحلة المعالجة. إن أي مشبك يدور تحت عزم دوران يقل عن 15 نيوتن متر يشير إلى أن المسمار قد وصل إلى القاع أو أن الركيزة الموجودة خلفه تالفة. قم بالتبديل إلى مثبت أطول أو قم بتقوية نقطة التثبيت.
- 6. عزل الحواف ومنع تسرب الرطوبة: تمتص الألواح الحجرية المرنة أقل من 0.5% من الماء بالنسبة للوزن، لكن الحافة المقطوعة — حيث تظهر الركام المعدني — هي نقطة دخول الرطوبة في ظروف الشحن عالية الرطوبة. امسح بقطعة قماش مبللة على طول 3 حواف مقطوعة عشوائية لكل وحدة. إذا انتقلت الصبغة إلى القماش، فهذا يعني أن الحافة لم تُحكم إغلاقها بعد القطع. يستغرق تطبيق مادة مانعة للتسرب شفافة ومقاومة للأشعة فوق البنفسجية باستخدام فرشاة رغوية 10 ثوانٍ لكل لوح، ويقضي على هذا الخطر تمامًا.
- المباراة: هل تتطابق اللوحة المركبة مع العينة المعتمدة في ظروف الإضاءة التي سيشاهدها العميل النهائي؟
- السند: هل يمكننا سحب لوحة عشوائية والتحقق من وجود طبقة لاصقة من نوع 85%+ على ظهرها؟
- الختم: هل جميع الحواف المقطوعة ميدانيًّا محكمة الإغلاق لمنع تسرب الرطوبة أثناء النقل؟
بعد التركيب، يتحول تركيز مراقبة الجودة إلى ضمان اتساق الدفعة. اختر 5 وحدات جدارية مجمعة عشوائياً في كل وردية عمل، وقم بإجراء اختبار استمرارية بصري من مسافة رؤية تبلغ 2 متر. سيقوم مشرف الموقع بوضع علامة على الفواصل التي يزيد عرضها عن 1.5 مم أو الوصلات المملوءة بالسدادة التي تبدو أغمق من سطح اللوحة — وهو اتصال لا ترغب في تلقيه من موقع بناء يبعد عنك ثلاث ولايات. تعمل الفواصل المحكمة الصنع في المصنع على تعويض التقلبات في درجات الحرارة التي تتعرض لها الوحدة أثناء النقل.
قبل شحن الوحدة، قم بتوثيق الدفعة. إن التقاط صورة بالهاتف لكل واجهة جدار مكتملة، مع تضمين الطابع الزمني ورقم المنصة النقالة، يوفر سجلاً للتتبع يحميك عندما يدعي العميل أن ‘اللون كان خاطئاً’. يجب على مصنعي الوحدات النمطية الذين يبيعون في أسواق الولايات المتحدة والاتحاد الأوروبي أن يطلبوا من مورد الألواح إجراء اختبارات دفعات من قبل جهة خارجية — تقارير مقاومة الحريق وفقًا لمعيار ASTM E84 الفئة A وشهادات CE المرتبطة بدورة الإنتاج المحددة تلك، وليس شهادة مصنع عامة صادرة منذ 3 سنوات. توفر JMS Decor وثائق متطابقة مع الدفعة للمشاريع التجارية لأن مفتش الامتثال للمعايير في سيدني أو فانكوفر يعتبر الشهادة العامة بمثابة عدم وجود شهادة على الإطلاق.
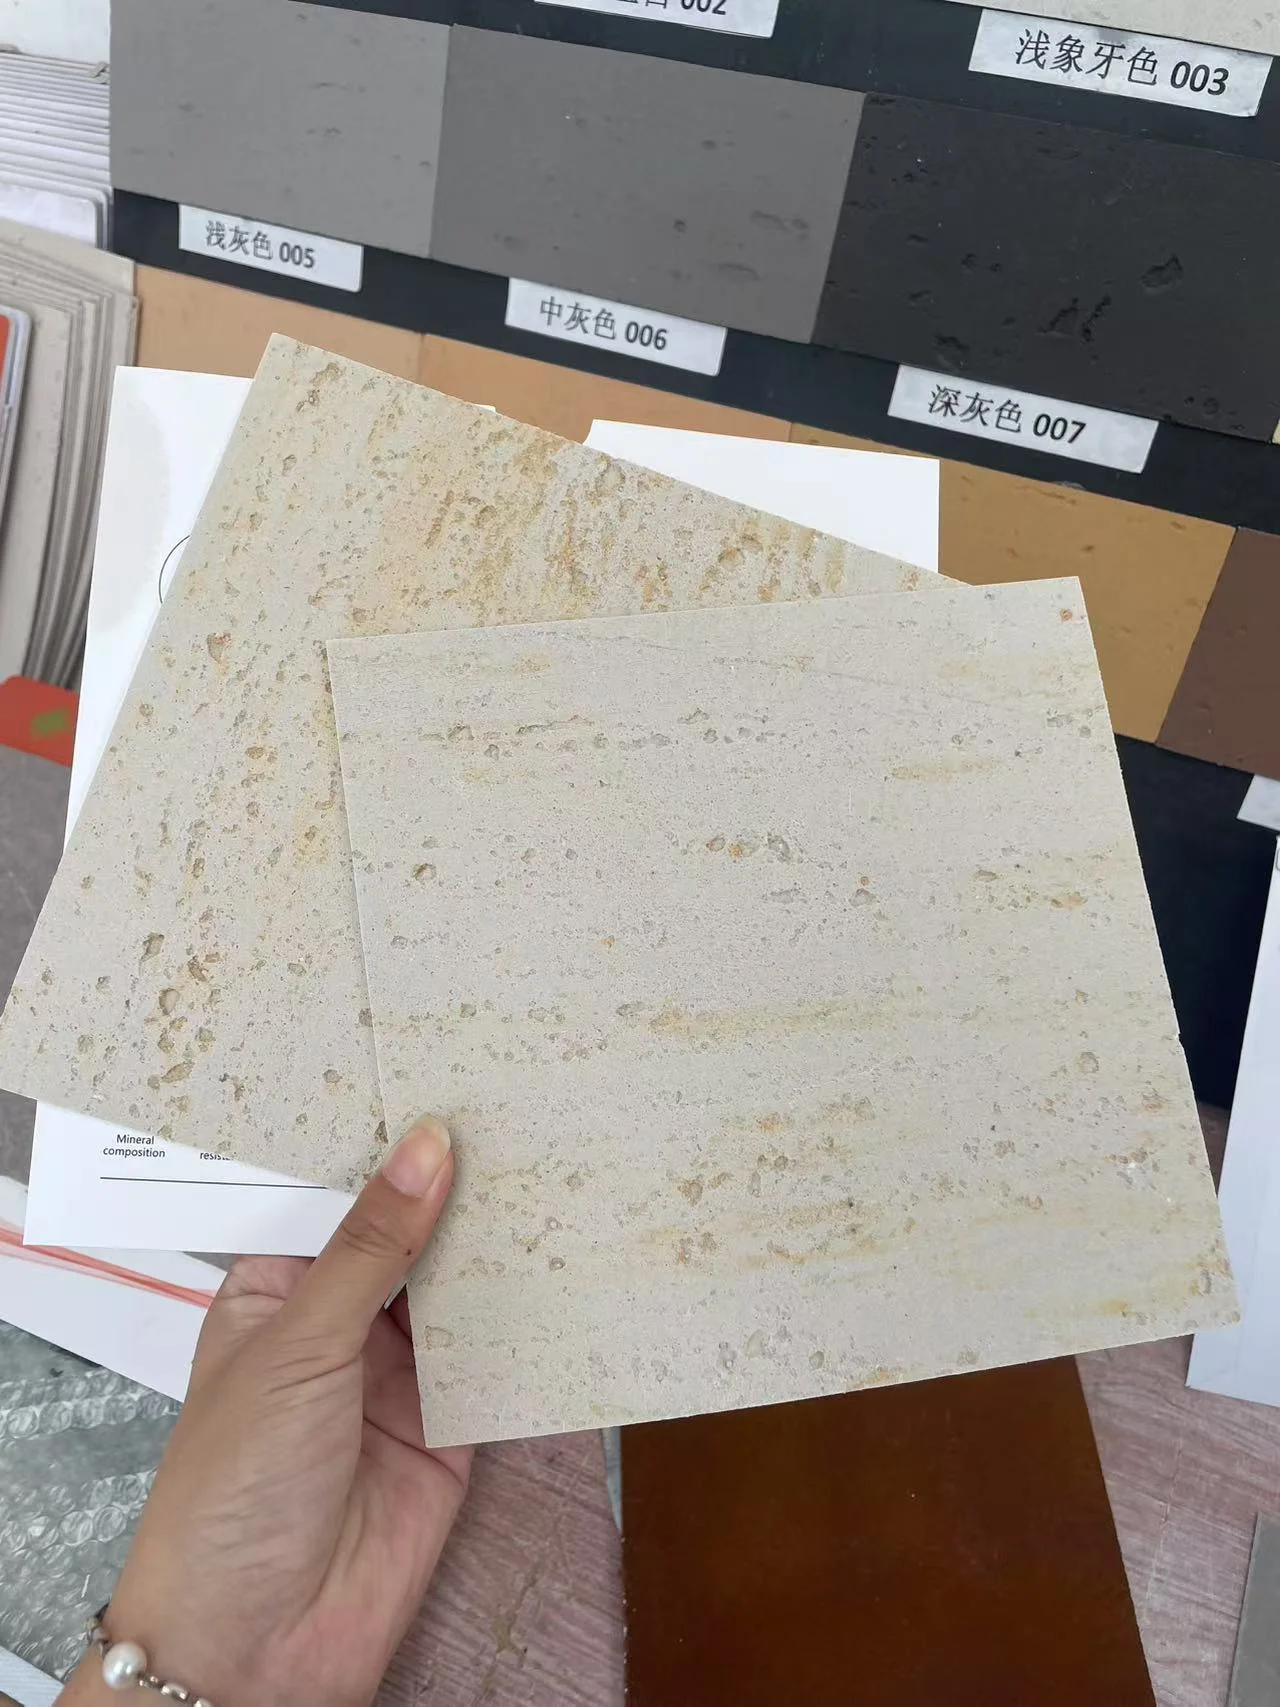
مدة المعالجة والتعامل مع المنتج قبل الشحن
لا تقم بنقل الوحدة إلا بعد أن يصل اللاصق إلى قوة التحمل الكافية — وعادةً ما يستغرق ذلك 24 ساعة في درجة حرارة الغرفة.
الفجوة بين التركيب في المصنع والتسليم في الموقع هي النقطة التي يفقد فيها معظم مصنعي الوحدات المعيارية السيطرة على الجودة. فالألواح الحجرية المرنة التي يتم معالجتها تحت الضغط الناتج عن التكديس أو التثبيت غير المتساوي ستظهر عيوبها من خلال الطبقة الخارجية. ولا يكمن الخطر الرئيسي في اللوح نفسه بل في المادة اللاصقة — فإذا لم تتجمد قبل رفع الوحدة على الشاحنة، فإن قوى القص الدقيقة الناتجة عن الاهتزازات تتسبب في ارتفاع الحواف، وهو عيب لا يمكن إصلاحه دون إعادة العمل.
يصل اللاصق المعدل بالبوليمر المتخصص من JMS Decor إلى قوة التحمل في غضون 4 ساعات تقريبًا عند درجة حرارة 20 درجة مئوية، مما يتيح تسليم الوحدات في نفس اليوم داخل حجرة ذات مناخ محكوم. ويستغرق التصلب الكيميائي الكامل من 24 إلى 48 ساعة اعتمادًا على الرطوبة وقدرة الركيزة على الامتصاص. تقوم الخشب الرقائقي وألواح OSB بسحب الرطوبة من الملاط، مما يسرع من تكوين الطبقة السطحية ولكنه يؤخر المعالجة الكاملة — وهو ما يؤدي إلى ظهور سطح يبدو جافًا من الأعلى ولكنه يظل لينًا من الأسفل. على النقيض من ذلك، تتطلب الإطارات المعدنية وقتًا أطول للتجفيف وتستفيد من استخدام مجرفة مسننة لمنع الانزلاق أثناء المعالجة.
- فحص درجة حرارة الركيزة: قم بقياس درجة حرارة الركيزة، وليس الهواء. عند درجات حرارة أقل من 10 درجات مئوية، يتباطأ التصلب بشكل أسي. قم بتسخين الألواح مسبقًا أو استخدم سخانات الأشعة تحت الحمراء للحفاظ على درجة حرارة خط الالتصاق أعلى من 15 درجة مئوية خلال الساعات الثماني الأولى.
- التثبيت مقابل الوزن الذاتي: لا تتطلب الألواح خفيفة الوزن استخدام أدوات تثبيت ميكانيكية ثقيلة. يكفي استخدام أسطوانة ذات حمل ثابت يبلغ 5 كجم/م² لإخراج الجيوب الهوائية دون إتلاف النسيج. أما التثبيت المفرط فيؤدي إلى تسطيح الأشكال ثلاثية الأبعاد.
- حافة مانعة للتسرب: قم بتطبيق مادة مانعة للتسرب JMS المناسبة على جميع حواف الألواح المكشوفة قبل خروج الوحدة من حجرة التخزين. وهذا يمنع تسرب المياه أثناء التخزين في الهواء الطلق ويقضي على ظاهرة الامتصاص التي قد تؤدي إلى انفصال شبكة الألياف الزجاجية.
- الحماية أثناء النقل: قم بلف واجهة الوحدة النهائية بغطاء غير منسوج يسمح بمرور الهواء — وليس من البولي إيثيلين — لتجنب تكوّن التكثيف. تقاوم الألواح الحجرية المرنة التشقق الناتج عن الانثناء، لكن الصدمات الموضعية الناتجة عن الأشرطة أو الوحدات المجاورة ستؤدي إلى تشقق السطح تمامًا مثل الحجر الطبيعي.
بالنسبة لخطوط الإنتاج عالية السعة، تُستخدم وحدات المعالجة على دفعات في منطقة التجهيز التي تتميز بتدفق هواء مُحكَم. يجب أن يُظهر قياس الرطوبة النسبية عبر الألواح المركبة انخفاضًا من >90% RH عند التركيب إلى <60% RH قبل الشحن — وهو مؤشر على اكتمال ترطيب المادة اللاصقة. هذه الممارسة وحدها تقلل مطالبات الضمان بأكثر من النصف، استنادًا إلى تتبع العيوب الداخلية عبر 12 شريكًا في مجال الإنشاءات الجاهزة.
الخاتمة
إن إعداد السطح وطرق القطع وبروتوكولات المعالجة التي تم توضيحها حتى الآن تعالج نقاط الفشل الواضحة. ويكمن الفارق بين خط الإنتاج المعياري عالي الإنتاجية وخط الإنتاج الذي يعاني من إعادة العمل في متغير واحد فقط: نظام المواد اللاصقة ومانعات التسرب. يمكن أن يتسبب الغراء الإنشائي العادي في ارتفاع الحواف في غضون ستة أشهر عندما تتجاوز الفجوة في المرونة حدود التفاوت المسموح بها في جودة الألواح. أما المواد اللاصقة ومانعات التسرب المصممة خصيصًا لهذا الغرض من شركة JMS Decor فتزيل هذا الخطر — فقد تم تصميم مدة الصلاحية والالتصاق الأولي بحيث تتوافق مع تركيبة الألواح، مما يتيح لعامل واحد مدرب إنجاز المهمة 30 مترًا مربعًا في الساعة دون الاعتماد على التخمين.
قبل أن تضع اللمسات الأخيرة على إجراءات التشغيل القياسية الخاصة بك، قم بإجراء تجربة تركيب محددة المدة مدتها 30 دقيقة على الركيزة الخاصة بك باستخدام عينات النظام الكاملة — الألواح، والمادة اللاصقة، ومانع التسرب. هذا المعيار المرجعي الذي يستغرق نصف ساعة يحول المواصفات المختبرية إلى رقم يمثل تكلفة العمالة لكل متر مربع، يمكنك مقارنته مباشرةً بحل الكسوة الحالي الخاص بك. لا يستجيب قسم الإنتاج للكتيبات الترويجية؛ بل يستجيب للنتائج القابلة للتكرار. أثبت الجدوى الاقتصادية على خط الإنتاج الخاص بك.
الأسئلة المتداولة
ما هي الطبقة التحتية الأنسب لاستخدام الحجر المرن في المصانع؟
خشب رقائقي مقاوم للرطوبة أو إطارات معدنية مطلية بطبقة أساس مناسبة. قد يتضخم لوح OSB بسبب الرطوبة ويؤدي إلى انفصال الطبقات، لذا فإنه يمثل خطرًا في بيئات المصانع غير الخاضعة للرقابة. قم باختبار مستويات الرطوبة في منشأتك قبل اتخاذ قرار باستخدام لوح OSB.
ما هو المادة اللاصقة التي ينبغي أن نستخدمها في التطبيقات الصناعية عالية السرعة؟
لاصق مُعدَّل بالبوليمر وسريع التصلب، وليس مجرد غراء بناء عادي. تقدم شركة JMS Decor نظام لاصق متخصصًا مصممًا خصيصًا ليتناسب مع مرونة ألواحها وسرعة تصلبها. استخدم اللاصق الموصى به من JMS Decor للحفاظ على سريان الضمان وسرعة خط الإنتاج.
كيف يتم قطع الحجر المرن في إطار الإنتاج المعياري؟
منشار دائري بشفرة ذات أسنان دقيقة أو سكين متعدد الاستخدامات مخصص للأعمال الشاقة لإجراء قطع مستقيمة. بالنسبة للزوايا والمنحنيات، قم بعمل شق ثم اكسر الخشب، ثم قم بإنهاء العملية باستخدام مبرد؛ وتجنب تعقيد العملية أكثر من اللازم. احرص دائمًا على القطع من الجانب النهائي إلى الخارج للحصول على حواف نظيفة.
ما هي أسرع طريقة للتثبيت في الخطوط المعيارية؟
يُعد التثبيت باللاصق بالكامل الطريقة الأبسط والأسرع بالنسبة لمعظم سيور النقل في المصانع. أما المشابك الميكانيكية فتضيف خطوات إضافية، ولا تكون ضرورية إلا عندما يتعين إزالة الألواح لاحقًا. لذا، استخدم التثبيت باللاصق بالكامل ما لم يتطلب نظامك إمكانية الوصول إلى الألواح لاستبدالها.
متى يمكننا الشحن بعد تركيب الألواح الحجرية المرنة؟
يمكن مناولة الألواح وتعبئتها بعد حوالي 24 ساعة من المعالجة في درجة حرارة الغرفة. إذا كانت الرطوبة عالية أو درجة الحرارة منخفضة، فيجب الانتظار لمدة تصل إلى 48 ساعة قبل تكديسها للشحن. تجنب ربط الألواح أو لفها بإحكام حتى تكتمل معالجتها تمامًا.