소개
수손은 벽만 손상시키는 것이 아니라 가구에 대한 큰 투자의 전체를 파괴할 수 있습니다. 스톤 베니어의 미적 매력에도 불구하고, 거의 65%의 설치 실패는 부적절한 방수 기술에서 비롯되며, 곰팡이 성장, 구조적 손상 및 비싼 수리비용을 초래합니다.
방수 스톤 베니어와 관련하여 신화와 현실을 구분하는 것이 중요합니다. 많은 주택 소유자들은 모든 스톤 베니어 제품이 자연스럽게 수분을 저항한다고 잘못 믿으며, 몇 달 후에 값비싼 누수를 발견하게 됩니다. 이 종합 가이드는 소프트 스톤 패널 의 물 저항성에 대한 가장 지속적인 오해를 다루고, 설치가 수분 도전에 강건하게 견딜 수 있도록 실제적인 해결책을 제공합니다.
방수 스톤 베니어에 대한 오해 풀기
홈 리노베이션과 관련하여 스톤 베니어의 매력은 부인할 수 없습니다. 우아한 외관과 다용성은 실내와 실외 모두에서 인기 있는 선택입니다. 그러나 물리적 특성에 대해 상당한 혼란이 있습니다. 사실과 허구를 구분하여 다음 프로젝트에 대한 정보에 입각한 결정을 내릴 수 있도록 도와드리겠습니다.
스톤 베니어 제품은 수분 저항 능력에서 크게 다르며, 적절한 설치는 효과적인 방수를 위해 소재 자체만큼이나 중요합니다.
신화 #1: 모든 스톤 베니어는 자연적으로 방수된다
아마도 가장 널리 퍼진 오해는 모든 스톤 베니어가 기본적으로 물을 배출한다는 것입니다. 이는 단순히 사실이 아닙니다. 자연석은 본질적으로 다공성이 있어 수분이 다양하게 침투할 수 있으며, 이는 석재 종류에 따라 다릅니다. 제조된 스톤 베니어는 조성면에서 더 일관되지만 여전히 적절한 씰링이 필요합니다.
현실은 방수 스톤 베니어 제품이 존재하지만, 이는 스톤 자체가 자연스럽게 수분을 배출하기 때문이 아니라 특수 제조 공정과 처리를 통해 이 상태에 도달한다는 것입니다. 다른 재료는 서로 다른 수준의 수분 저항을 제공하므로, 습한 환경에서는 제품 선택이 매우 중요합니다.
신화 #2: 스톤 베니어는 욕실 같은 습한 지역에 사용할 수 없다
많은 주택 소유자들은 스톤 베니어와 습기에 취약한 지역은 어울리지 않는다고 믿습니다. 이것은 “바보 같은 소리” 적절한 예방 조치를 취한다면, 스톤 베니어는 적절한 방수 시스템으로 설치될 때 욕실, 수영장 주변, 심지어 샤워 부스에서도 완벽하게 활약할 수 있습니다.
중요한 것은 젖은 곳에서의 스톤 베니어 사용을 피하는 것이 아니라, 올바른 수분 차단벽, 방수 멤브레인, 그리고 적합한 실란트를 시공에 포함시키는 것입니다. 올바른 방법으로 접근하면, 스톤 베니어는 고습도 환경에서도 눈부시고 내구성 있는 표면을 제공할 수 있습니다.
다공성과 재료 구성에 대한 진실
스톤 베니어가 방수성이 있습니까? 답은 특정 제품에 따라 완전히 달라집니다. 다공성—재료의 빈 공간 측정값—은 돌 종류와 제조 방법에 따라 극적으로 다릅니다.
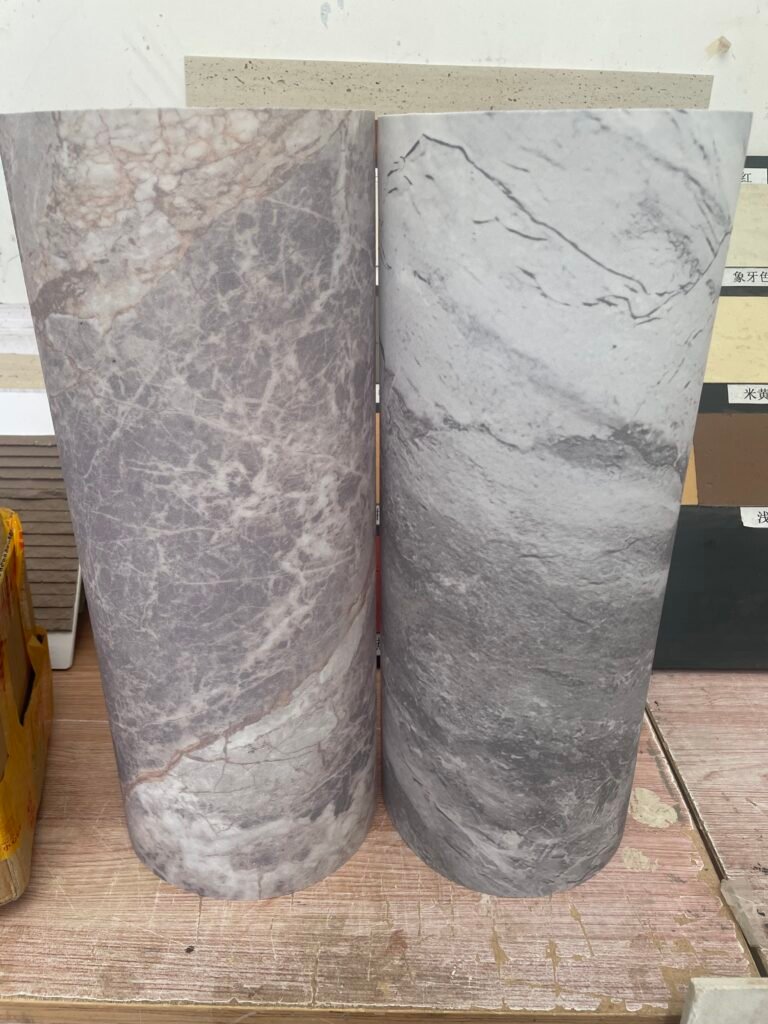
소프트 스톤 패널, JMS Decor와 같은 제품들은 특정 용도에 대한 다공성 문제를 해결하기 위해 다양한 밀봉 옵션으로 맞춤 제작이 가능합니다. 이 적응력은 건조한 실내 벽에서 습기에 노출된 외벽 표면까지 다양한 환경 조건에 적합하게 만듭니다.
| 스톤 베니어 유형 | 평균 다공성 (%) | 흡수율 (%) | 필요 밀봉제 유형 | 권장 응용 분야 |
|---|---|---|---|---|
| Natural Stone Veneer | 15-20 | 3.5-7.0 | 침투형 실록산 | 외부 파사드, fireplace surrounds |
| 제조석 | 22-30 | 10-15 | 아크릴 기반 실란트 | 실내 액센트 월, 배수 기능이 있는 외벽 |
| 유연성 있는 석재 베니어 | 8-12 | 2.0-4.5 | 폴리우레탄 실러 | 욕실 벽, 주방 백스플래시 |
| 석회석 veneer | 25-35 | 12-18 | 실란-실록산 블렌드 | 저습도 실내 용도 |
| 슬레이트 veneer | 5-10 | 1.5-3.0 | 수성 방수제 | 샤워실 벽, 수영장 주변 |
방수는 소재보다 시공에 달려 있는 이유
석재 veneer 시공의 방수 성능은? 사실 가장 방수성이 뛰어난 소재라도 설치 불량 시에는 기능을 상실합니다.
효과적인 석재 veneer 방수는 표면 소재뿐만 아니라 전체 벽체 시스템에 대한 세심한 관리가 필요합니다.
올바른 시공에는 veneer 뒤의 수분 장벽, 적절한 플래싱 처리, 그리고 적절히 혼합된 모르타르가 포함됩니다.
이러한 요소가 없다면 프리미엄 자재라도 결국 수분에 의해 손상됩니다. 석재 베니어 프로젝트의 방수 성능은 가장 취약한 부품만큼만 강합니다.
JMS Decor의 접근 방식은 시스템 호환성에 초점을 맞춤으로써 이러한 현실에 대응합니다 – 즉, 소프트 스톤 패널이 현대적인 방수 공법과 조화롭게 작동하여 특정 습기 문제에 대해 내구성 있는 솔루션을 제공합니다.
이러한 현실을 이해하면 프로젝트에 맞는 석재 베니어에 대한 정보에 근거한 결정을 내릴 수 있으며, 적절한 자재와 시공 방법으로 습기 문제를 적절히 관리하면서도 그 아름다움을 즐길 수 있습니다.

Essential Waterproofing Techniques for Stone Veneer
Protecting your stone veneer from moisture damage is crucial for maintaining both its appearance and structural integrity. While stone offers natural beauty to any space, its porous nature requires specific waterproofing treatments to ensure longevity, especially in moisture-prone areas.
Proper waterproofing of stone veneer involves a systematic approach that includes appropriate substrate preparation, moisture barriers, and high-quality sealants tailored to the specific type of stone material.
Choosing the Right Sealants for Porous Stone
The first line of defense for waterproof stone veneer starts with selecting appropriate sealants. Not all sealers work equally well on different stone types. Natural stone veneers typically benefit from penetrating siloxane sealers that bond with the mineral structure, while manufactured veneers might require acrylic or polyurethane products.
When selecting a sealer, consider both the stone’s porosity and your specific application. High-traffic or frequently wet areas demand more robust protection than decorative interior walls. For optimal protection, apply sealants in multiple thin coats rather than one heavy application, allowing proper curing between applications.
Using Moisture Barriers and Waterproof Membranes
Effectively protecting stone veneers requires addressing moisture from behind the material as well as from the front. Moisture barriers act as a critical defense layer between your home’s structure and the veneer surface. These barriers “keep things tight” by preventing water migration that could damage not just the veneer but underlying wall systems.
Industry best practices for how to waterproof stone veneers involve installing a minimum of two layers of water-resistant material: a weather-resistant barrier (like building paper or house wrap) followed by a waterproof membrane designed specifically for masonry applications. This dual-layer approach creates redundancy that significantly reduces moisture penetration risk.
| Waterproofing Component | Material Options | Installation Method | Expected Lifespan | Moisture Protection Rating |
|---|---|---|---|---|
| Weather Barrier | Asphalt-Impregnated Paper | Horizontal Lap Pattern | 15-20 years | Moderate (65%) |
| Weather Barrier | Synthetic House Wrap | Vertical Installation | 20-30 years | High (85%) |
| Waterproof Membrane | Sheet Membrane | Adhesive Application | 25-30 years | Very High (95%) |
| Waterproof Membrane | Liquid-Applied | Roller/Spray Application | 15-25 years | Very High (90%) |
| Sealant | Siloxane Penetrating | Spray/Brush Application | 5-10 years | High (80%) |
| Sealant | Polyurethane Coating | Brush Application | 7-12 years | Very High (95%) |
Importance of Backer Boards and Weep Screeds
Proper substrate preparation is essential for waterproofing veneer stone. Cement backer boards provide a stable, moisture-resistant foundation that prevents warping and mold growth behind the veneer. Unlike standard drywall, these specialized boards maintain structural integrity even when exposed to moisture.
Equally important are weep screeds – metal or plastic strips installed at the bottom of exterior installations that create drainage pathways for any moisture that penetrates the veneer. These components allow water to escape rather than becoming trapped behind the stone, significantly reducing the risk of long-term moisture damage.
침투형 시커 vs. 도막형 코팅 비교
석재 베니어의 최적 방수 시공법을 이해하려면 침투형과 도막형 실러의 근본적인 차이를 파악하는 것이 중요합니다. 침투형 실러는 석재의 기공 속으로 흡수되어 외관은 그대로 유지하면서 무색투명한 보호막을 형성해 수분 침투를 막습니다. 이는 고급 천연 석재의 자연스러운 멋을 그대로 살리고자 할 때 이상적입니다.
이와 달리 도막형 코팅은 석재 표면 위에 물리적 장벽을 형성합니다. 뛰어난 방수 성능을 제공하지만 광택을 더하거나 색상을 다소 짙게 변색시켜 원石材의 외관을 바꿀 수 있습니다. JMS Decor는 두 가지 실링 옵션을 모두 적용한 맞춤형 방수 석재 베니어 솔루션을 제공해 고객이 미적 선호도와 방수 요구사항 사이에서 이상적으로 균형을 이룰 수 있도록 지원합니다.
이러한 전문적인 방수 기술을 시공하면 극한의 습한 환경에서도 석재 베니어의 아름다움을 유지하면서 수명을 크게 연장할 수 있습니다.

방수 석재 베니어 단계별 설치 가이드
Installing waterproof stone veneer might seem intimidating, but with the right approach, even DIY enthusiasts can achieve professional results. This guide breaks down the process into manageable steps, focusing on proper waterproofing techniques that ensure your stone veneer remains beautiful and damage-free for years to come.
Proper waterproofing during stone veneer installation requires careful attention to substrate preparation, moisture barrier application, and appropriate sealing techniques to prevent water damage and extend the life of your installation.
Preparing the Substrate: Key Steps for Success
The foundation of any successful waterproof stone veneer installation begins with proper substrate preparation. Start by inspecting your wall surface for any damage, mold, or structural issues that need addressing before installation begins.
For exterior applications, ensure the wall sheathing is in good condition and free of rot. For interior applications, especially in moisture-prone areas like bathrooms, cement backer board is strongly recommended over standard drywall. Remove any loose paint, wallpaper, or debris that could prevent proper adhesion.
Before moving forward, check that your surface is flat and plumb. Variations greater than ¼ inch over 10 feet should be corrected, as they can compromise both the appearance and waterproofing effectiveness of your finished project.
Installing Moisture Barriers and Drainage Systems
One of the best waterproofing practices for stone veneers involves creating effective moisture management systems behind the stone. Start by installing a weather-resistant barrier like building paper or house wrap, overlapping seams by at least 2 inches to create a continuous protective layer.
Next, install a drainage mat or rainscreen system to create a capillary break between the moisture barrier and the veneer. This small air gap allows any moisture that penetrates the veneer to drain downward rather than being trapped against your wall. The system works so well it’s “slick as a whistle” at channeling water away from your structure.
| Installation Layer | Material Options | Installation Method | Purpose | Critical Details |
|---|---|---|---|---|
| 기재 | Plywood, OSB, Concrete | Existing or New Construction | 구조 지지 | Must be clean, stable, free of damage |
| Weather Barrier | Tyvek, Felt Paper, Building Wrap | Horizontal Overlapping Layers | Primary Moisture Protection | 2″ minimum overlap, taped seams |
| Drainage Plane | Rainscreen Mat, Drainage Mat | Continuous Coverage | Water Drainage Path | Must terminate at weep screed |
| Metal Lath | Galvanized Diamond Lath, Expanded Metal | Mechanically Fastened | Mortar Adhesion | Fasteners every 6″ on studs |
| Scratch Coat | Modified Thinset, Mortar Mix | Trowel Application | Base for Veneer | Must be roughed up before curing |
| Waterproofing Membrane | Liquid Applied, Sheet Membrane | According to Manufacturer | Secondary Moisture Barrier | Must cover 100% of surface area |
Applying Stone Veneer with Waterproof Mortar
For maximum moisture resistance, use modified thinset mortar specifically formulated for stone applications. These products contain polymers that enhance both adhesion and water resistance. Mix according to manufacturer instructions – the consistency should resemble thick peanut butter.
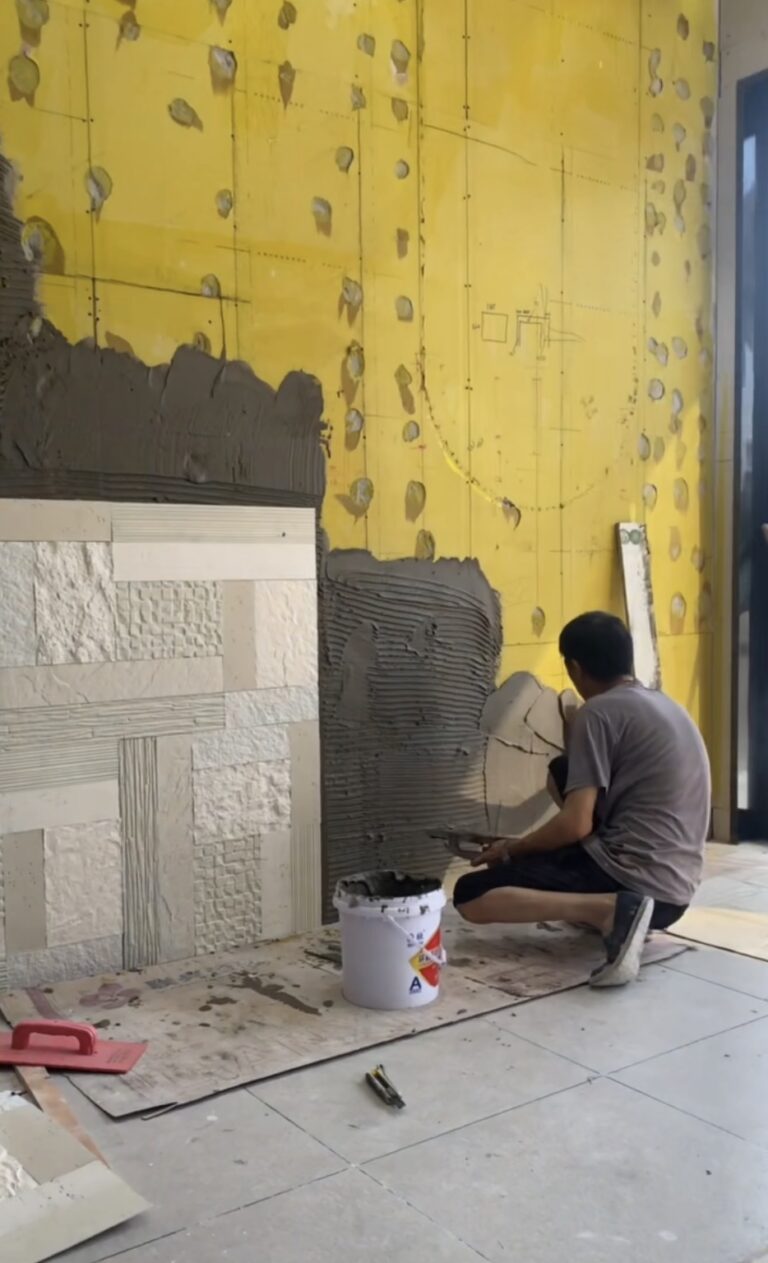
When applying waterproof stone veneer, work from the bottom up for natural-looking installations. Apply mortar to both the back of each stone and the wall surface using a notched trowel, creating a strong bond that prevents water infiltration. Press stones firmly, wiggling slightly to ensure full contact.
Maintain consistent joint widths between stones (typically ¼ to ½ inch) unless installing dry-stack veneer. For areas with direct water exposure, such as shower surrounds, use waterproof mortar for both setting and grouting.
Finishing Touches: Sealing and Testing for Leaks
After installation and proper curing (typically 24-48 hours), apply high-quality penetrating sealer designed for your specific stone type. JMS Decor’s soft stone panels come with customized sealing options that make this step even more straightforward for DIY enthusiasts, ensuring reliable moisture resistance without complicated application processes.
For exterior installations or wet interior areas, conduct a water test to verify your waterproofing effectiveness. Spray the installation with water and inspect behind the wall (when possible) for any signs of moisture penetration. Address any detected leaks immediately.
By following these steps, you’ll create a stone veneer installation that not only enhances your space aesthetically but also stands up to moisture challenges with confidence. Remember that proper waterproofing isn’t just about the stone itself but the entire system working together.
Common Mistakes to Avoid with Waterproof Stone Veneer
When installing stone veneer, seemingly minor oversights can lead to significant problems down the road. Despite the beauty and durability stone veneers offer, their performance depends heavily on proper installation techniques—particularly when it comes to waterproofing. Let’s explore the most common mistakes homeowners and contractors make, so you can enjoy a trouble-free installation.
Proper stone veneer waterproofing requires attention to substrate preparation, appropriate sealant selection, and effective drainage systems—overlooking any of these elements can lead to moisture damage regardless of the quality of materials used.
Skipping Sealants: A Recipe for Mold and Cracks
Perhaps the most frequent mistake is assuming that stone veneer is naturally waterproof without additional protection. While some products offer inherent moisture resistance, nearly all stone veneers benefit from proper sealing. Skipping this crucial step leaves your installation vulnerable to water absorption, which can lead to mold growth, efflorescence, and even structural damage.
Quality sealants create an invisible barrier that repels water while allowing the stone to breathe. For optimal protection, select products specifically designed for your type of stone veneer. Remember that even properly sealed installations require regular maintenance—most sealants need reapplication every 3-5 years, depending on exposure levels and product quality.
Ignoring Substrate Prep: Why It Matters
Another critical mistake occurs before the first stone is even placed. Inadequate substrate preparation can doom your waterproof stone veneer from the start. Proper installation requires a clean, structurally sound surface that can support the veneer’s weight and provide a suitable foundation for waterproofing elements.
Don’t rush through this foundational step. Remove any existing paint, wallpaper, or loose material from the installation surface. Repair damaged areas and ensure the substrate is completely dry before proceeding. In moisture-prone areas, cement backer board provides a far better foundation than standard drywall—this isn’t the place to cut corners if you’re “playing the long game” with your installation.
| Common Mistake | Consequence | Failure Rate (%) | Average Repair Cost | Prevention Method |
|---|---|---|---|---|
| Skipping Sealant | Water Penetration, Efflorescence | 78% | $1,200-$3,500 | Apply Quality Penetrating Sealer |
| Poor Substrate Preparation | Adhesion Failure, Mold Growth | 65% | $2,500-$5,000 | Proper Cleaning, Repair, Backing |
| Inadequate Drainage Systems | Water Trapping, Structural Damage | 83% | $4,000-$12,000 | Install Flashing, Weep Holes |
| Wrong Mortar Type | Cracking, Separation | 52% | $1,800-$4,200 | Use Modified Thinset for Stone |
| Improper Flashing Installation | Water Intrusion at Transitions | 91% | $3,500-$9,000 | Follow Manufacturer Specifications |
Poor Drainage Planning: Leaks Waiting to Happen
Is stone veneer water resistant? Yes, with proper installation—but that installation must include thoughtful drainage solutions. A common misconception leads many installers to focus solely on preventing water from entering the system while failing to plan for water that inevitably will find its way through.
Effective water management requires drainage pathways behind the veneer. This includes properly installed flashing at transitions (windows, doors, rooflines) and weep systems at the bottom of installations. Without these elements, trapped moisture becomes a ticking time bomb for your stone veneer waterproofing efforts, potentially causing serious damage to underlying structures.
Using the Wrong Materials for Wet Areas
Not all stone veneers are created equal when it comes to moisture resistance. Using interior-rated products in exterior applications or high-moisture indoor areas like bathrooms is a common and costly mistake. Always verify that your selected veneer is rated for your specific application.
Similarly, using standard mortars rather than waterproof formulations undermines your waterproofing efforts. How to waterproof stone veneers properly includes using modified thinset mortars that contain polymers for enhanced moisture resistance. JMS Decor’s product line includes options specifically engineered for wet environments, with expert guidance to help customers select appropriate materials for their specific moisture challenges.
By avoiding these common mistakes, you’ll maximize both the beauty and longevity of your stone veneer installation. Remember that quality materials and proper technique work together to create truly waterproof stone veneer installations that stand the test of time.
Price Breakdown and Budgeting for Waterproof Stone Veneer
Understanding the costs associated with waterproof stone veneer projects helps you make informed decisions that balance quality, aesthetics, and budget constraints. While stone veneer offers stunning visual appeal and durability, the investment varies based on materials, installation methods, and long-term maintenance considerations.
The total cost of waterproof stone veneer installations typically ranges from $12-$55 per square foot, with material quality, installation complexity, and moisture protection requirements being the primary factors affecting overall project budgets.
Cost of Materials: Stone Veneer, Sealants, and Barriers
The foundation of your budget begins with the materials themselves. Waterproof stone veneer products range widely in price based on composition, source, and design complexity. Natural stone veneers typically cost between $10-$25 per square foot for materials alone, while manufactured options range from $5-$15 per square foot.
Don’t overlook the additional materials essential for proper waterproofing. Quality moisture barriers add $0.50-$2.00 per square foot, while appropriate sealants range from $0.75-$3.00 per square foot depending on the formulation and coverage area. Professional-grade waterproof veneer stone systems that include integrated moisture protection may cost more initially but can reduce long-term maintenance expenses.
Installation Expenses: DIY vs. Professional Costs
Labor represents a significant portion of your total investment. Professional installation typically adds $8-$15 per square foot to your project, with complex patterns or difficult access areas commanding premium rates. While DIY installation can “save big bucks” upfront, it’s important to realistically assess your skills, particularly for waterproofing components where mistakes can prove costly.
For DIY enthusiasts, factor in tool costs if you don’t already own specialty items like wet saws, notched trowels, and proper safety equipment. These can add $200-$500 to your project budget. Even with DIY installation, consider consulting with a professional for the waterproofing aspects to ensure proper moisture management.
| Cost Component | Economy Range | Mid-Range | Premium | Average % of Total Budget |
|---|---|---|---|---|
| Stone Veneer Materials | $5-$8/sq.ft | $9-$15/sq.ft | $16-$25/sq.ft | 40-60% |
| Waterproofing Materials | $1.25-$2.50/sq.ft | $2.75-$4.50/sq.ft | $5-$8/sq.ft | 10-15% |
| 전문 시공 | $8-$10/sq.ft | $11-$14/sq.ft | $15-$22/sq.ft | 30-45% |
| Substrate Preparation | $1-$2/sq.ft | $3-$4/sq.ft | $5-$7/sq.ft | 5-10% |
| Ongoing Maintenance | $0.15-$0.25/sq.ft/year | $0.30-$0.50/sq.ft/year | $0.60-$1.00/sq.ft/year | 5-8% annually |
Tiered Pricing Options from Manufacturers Like JMS Decor
Volume purchasing can significantly reduce your per-unit costs. Manufacturers like JMS Decor offer tiered pricing structures that reward larger orders with substantial discounts. For example, ordering 500+ square feet might reduce material costs by 15-25% compared to smaller orders, making large-scale projects more economically efficient.
Many manufacturers also offer varying product lines at different price points. JMS Decor provides options ranging from budget-friendly waterproof stone veneer panels to premium custom-designed solutions. This tiered approach allows you to select products that align with both your aesthetic goals and financial parameters while maintaining essential waterproofing properties.
Long-Term ROI: Durability vs. Upfront Investment
Properly installed and protected stone veneers typically last 20-30 years or more, making them an excellent long-term investment. While initial costs may exceed those of some alternatives, the durability, low maintenance requirements, and timeless appeal of stone offer substantial return on investment.
The best waterproofing practices for stone veneers may add 10-15% to your initial project cost but can extend the installation lifespan by 50% or more. When calculating ROI, factor in both the immediate aesthetic enhancement and the long-term protection against moisture-related repairs that proper waterproofing provides.
By understanding these cost components and how to optimize your budget, you can create a stunning, durable stone veneer installation that delivers lasting value while effectively managing moisture challenges.
결론
After years of digging into what makes soft stone panels work, I’ve learned one thing: waterproofing isn’t just a feature—it’s the backbone of a lasting installation. From busting myths to nailing the right techniques, it’s clear that picking quality materials and installing them right keeps moisture nightmares at bay.
I’ve seen how companies like JMS Decor craft panels that don’t just look good but stand up to the toughest conditions with the right care. It’s all about blending expertise with practical know-how. So, if you’re eyeing a stone veneer upgrade, don’t sleep on the details—it’s a “slam dunk” for protecting your space and making it shine for years.
자주 묻는 질문
Q1: Is stone veneer waterproof?
A1: No, manufactured stone veneer is not waterproof. It is a porous material made from Portland cement, lightweight aggregates, and iron oxide pigments to mimic natural stone. It can absorb water, making it susceptible to moisture-related issues if not installed correctly.
Q2: How can you waterproof stone veneer effectively?
A2 등급: To waterproof stone veneer effectively, a waterproofing membrane should be applied behind the veneer. This acts as a barrier to prevent moisture from penetrating, thus protecting the underlying structure.
Q3: What are the common mistakes in stone veneer installation?
A3 등급: Common mistakes include applying veneer directly to plywood without a barrier, not using a waterproofing membrane, and failing to account for water exposure in areas like bathrooms and kitchens.
Q4: What is the best method for waterproofing stone veneers outdoors?
A4 등급: Using a breathable, water-resistant barrier and applying a quality waterproof sealer on exterior stone veneers helps prevent water absorption and damage from freezing and thawing cycles.
Q5: What materials are used to create manufactured stone veneer?
A5 등급: Manufactured stone veneer is generally made from Portland cement, lightweight aggregates, and iron oxide pigments to give it the appearance of natural stone.
Q6: Can stone veneers be used in wet areas like showers?
A6 등급: Yes, stone veneers can be used in wet areas like showers, provided they are properly waterproofed with a suitable barrier to prevent moisture penetration.
Q7: What type of mortar is recommended for stone veneer installation?
3. A7: Latex-modified mortar is recommended for stone veneer installation as it adheres well to both the stone and the substrate, providing a strong bond and reliable support.
Q8: Why is a drainage plane important in stone veneer installations?
6. A8: A drainage plane is crucial as it helps direct moisture away from the structure, preventing water from becoming trapped behind the veneer, which could lead to mold and rot.
8. 외부 링크
- Is Stone Veneer Waterproof? – Black Bear Mountain Stone
- Waterproofing Behind Stone Veneers (Prevent Mold and Rot) – ASIRI Designs
- Waterproof Porous Stone – Eco-Wares
- How To Install Stacked Stone Veneer | Storables
- 5 Common Mistakes In Thin Stone Veneer Installation
- What’s The Preferred Way To Water Proof Under Stone Veneer
- Ultra Thin Natural Stone – UTN | Home
- Preparation for Installing Thin Stone Veneer