إن تحديد الألواح الحجرية المرنة المناسبة هو الشيء الوحيد الذي يقف بين التشطيبات المعمارية السلسة والمشروع الذي تحدده المواد المتشققة وإعادة العمل المكلفة. من المعروف أن تكسية الجدران والأعمدة والأقواس المنحنية بالحجر أو البلاط التقليدي هي نقطة فشل معروفة، وغالبًا ما تؤدي إلى تجاوزات في الميزانية بسبب الهدر المفرط للمواد ومتطلبات العمالة المتخصصة. إن سوء التقدير أثناء عملية الثني لا يبدو سيئًا فحسب؛ بل يعرض التركيب بأكمله للخطر ويفرض عمليات هدم مكلفة.
يعمل هذا الدليل كإجراء تشغيل قياسي تقني لفعل ذلك بشكل صحيح. سنستعرض الحسابات الهامة الخاصة بالحد الأدنى لنصف قطر الانحناء لمنع حدوث كسور ونقدم سير العمل خطوة بخطوة لتغليف الأعمدة. كما سنغطي أيضًا الأدوات المحددة اللازمة للتركيب النظيف والتقنيات المطلوبة لإنشاء طبقات غير مرئية تقريبًا، مما يضمن أن النتيجة النهائية تفي بالمواصفات الهندسية والتصميمية.
تحدي الأسطح المنحنية
تاريخياً، كان تطبيق الحجر على الملامح المعمارية المنحنية يمثل مشكلة هندسية ومشكلة في الميزانية. تزيل القشرة الحجرية المرنة الحديثة هذه العوائق، مما يجعل التصاميم المعقدة والعضوية عملية وفعالة من حيث التكلفة.
حدود المواد التقليدية
الألواح الحجرية التقليدية صلبة وثقيلة بطبيعتها. وهذا ما يجعلها غير مناسبة بشكل أساسي للأشكال المعمارية العضوية مثل الأعمدة أو الأقواس أو الجدران الكاسحة. تتطلب أي محاولة لاستخدامها على الأسطح غير المسطحة قطعاً مكثفاً حسب الطلب، وتركيباً متخصصاً، والأهم من ذلك كله تعزيزاً هيكلياً كبيراً للتعامل مع الوزن الهائل. لم تكن هذه العملية تتطلب عمالة كثيفة وبطيئة فحسب، بل كانت تحدّ بشدة من حرية التصميم، مما جعل العديد من المفاهيم الإبداعية بعيدة المنال من الناحية العملية.
العوائق الهيكلية والتكلفة
تُترجم القيود المادية للحجر التقليدي مباشرةً إلى عقبات مالية وهيكلية كبيرة. فالوزن الهائل للألواح الحجرية - الذي غالباً ما يتجاوز 30 كجم/م² - يتطلب أن يكون الهيكل الأساسي مصمماً بشكل مفرط لتحمل الحمل، وهو ما يمثل عاملاً رئيسياً في تكاليف المشروع.
وعلاوة على ذلك، فإن الحاجة إلى قطع دقيق ومخصص لكل لوحة لتلائم المنحنى يؤدي إلى زيادة نفقات العمالة وإطالة الجداول الزمنية للمشروع. هذه التكاليف المضاعفة كثيراً ما تجعل التصاميم المنحنية الطموحة غير مجدية لجميع المشاريع باستثناء المشاريع ذات الميزانيات العالية.
الحلول الحجرية المرنة الحديثة
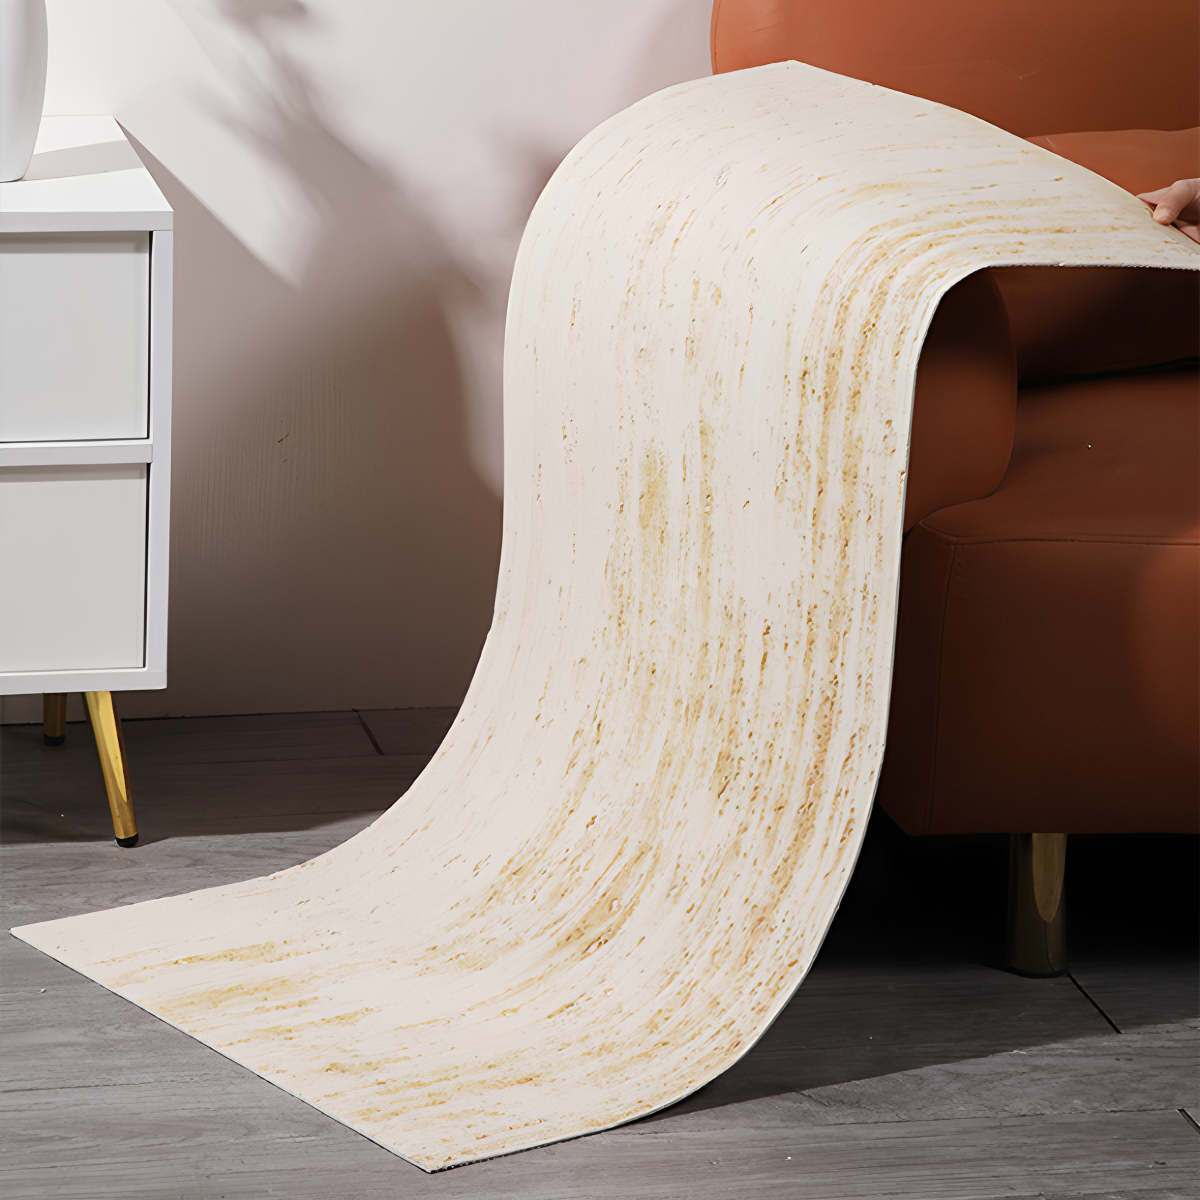
تعالج القشرة الحجرية المرنة من JMS Decor هذه القيود التاريخية مباشرةً. توفر ألواحنا، المصنوعة من مركب من مسحوق الحجر الطبيعي والمواد الطينية المعدلة (MCM)، المظهر والملمس الأصلي للحجر دون الحاجة إلى الوزن أو الصلابة. وبفضل وزنه الذي يتراوح بين 3.5 و6.0 كجم/م² فقط، فإن نظامنا يلغي الحاجة إلى التعزيز الهيكلي المكلف، وهي ميزة رئيسية لكل من الإنشاءات الجديدة والتجديدات.


- حرية التصميم: تتوافق هذه المادة بسهولة مع الأسطح المقعرة والمحدبة على حد سواء، مما يتيح تشطيبات حجرية أصلية على الأعمدة ذات نصف القطر الضيق والأقواس والجدران المتدفقة.
- مراقبة التكاليف: من خلال إزالة الحاجة إلى إجراء ترقيات هيكلية وتقليل وقت التركيب، يقلل الحجر المرن الذي نقدمه من التكلفة الإجمالية للمشروع بشكل كبير مقارنةً بالطرق التقليدية.
- متانة مصممة هندسيًا: تمنح الدعامة القوية المصنوعة من الألياف الزجاجية أو البوليستر كل لوح قوة انثناء استثنائية، مما يضمن ثنيها دون تشقق وتحملها للضغوطات البيئية.
لماذا يفشل الحجر التقليدي على المنحنيات
تخلق صلابة الحجر التقليدي نقاط فشل متأصلة عند وضعه على الأسطح المنحنية، حيث لا يمكنه تبديد الإجهاد الحراري أو استيعاب الرطوبة، مما يؤدي إلى التواء، وتشوه وتشقق.
الإجهاد الحراري والالتواء
الألواح الحجرية الصلبة، وخاصةً الرخام، معرضة بشدة للتدوير الحراري. عند تعريضها للحرارة الشمسية، تتمدد بلورات الحجر ولكنها لا تتراجع بالكامل إلى حجمها الأصلي عند التبريد. تتسبب هذه العملية التي لا رجعة فيها في حدوث تشوه تدريجي تراكمي. وبمرور الوقت، يجبر هذا الضغط المستمر الألواح على الانحناء والالتواء، مما يؤدي إلى واجهة غير مستقرة ومعرّضة للخطر بصرياً.
- تتسبب دورات التسخين والتبريد المتكررة في تمدد بلورات الحجر دون أن تنكمش بالكامل، مما يؤدي إلى تشوه تراكمي لا رجعة فيه.
- ويكون تأثير الانحناء هذا أكثر وضوحًا على الواجهات المواجهة للشمس، حيث يعمل الكسب الشمسي المكثف على تسريع عملية التدوير الحراري.
- ويؤدي الاعوجاج الناتج عن ذلك إلى الإضرار بالسلامة الجمالية للمبنى ويخلق مخاطر كبيرة على السلامة الإنشائية.
قابلية التأثر بالتشقق والصقيع
يمكن أن تؤدي ممارسات التركيب إلى خلق أو كشف نقاط ضعف في الحجر التقليدي. إن توجيه اللوح بعكس تعريقه الطبيعي (بطانة الوجه) يكشف عن نقاط ضعف معرضة للرطوبة. وبمجرد اختراق الماء لهذه الطبقات، فإن ذلك يؤدي إلى تلفها بسبب تبلور الملح وتبلور الصقيع الذي يعمل كرافعات لنزع الحجر من الداخل.
- إن تركيب الحجر على مستوى الفراش الطبيعي، والمعروف باسم الفراش الوجهي، يكشف عن نقاط الضعف الكامنة ومستويات الانشقاق.
- ويسهّل دخول الرطوبة تبلور الملح وتبلور الصقيع داخل هذه الطبقات، مما يؤدي إلى ضغط داخلي يؤدي إلى تكسير الحجر.
- يؤدي هذا التفكك الداخلي إلى فشل كارثي، حيث تتحلل المادة من الداخل.
تركيز الإجهاد عند الزوايا
تصمد الأقواس القديمة لعدة قرون لأن شكلها المنحني يوزع الوزن بالتساوي. وعلى النقيض من ذلك تماماً، فإن الحجر التقليدي المقطوع إلى زوايا حادة بزاوية 90 درجة يفعل العكس. فهو يركز كل الضغط الميكانيكي والحراري مباشرة على الزوايا. وتصبح نقاط الضغط العالي هذه أكثر المواقع المحتملة لحدوث التشققات وفشل المواد.
- المواد الصلبة مثل الحجر التقليدي تركز بطبيعتها الضغط الميكانيكي عند الزوايا الحادة بزاوية 90 درجة.
- تتفوق الأشكال المنحنية، مثل الأقواس، من الناحية الهيكلية لأنها توزع الأحمال بالتساوي على كامل سطحها، مما يزيل نقاط الضغط العالي هذه.
- هذا الضعف الأساسي يجعل الحجر المترابط غير مناسب للتصميمات المعمارية غير الخطية، حيث يكون عرضة للتشقق عند مفاصل الزوايا.
ارتقِ بتصميماتك مع القشرة الحجرية المرنة
الحد الأدنى لنصف قطر الانحناء للحجر المرن
يتم تحديد الحد الأدنى لنصف قطر الانحناء للوح الحجري المرن حسب سُمكه؛ فالقشرة الرقيقة (2.5-5 مم) ضرورية لتغليف الأعمدة الضيقة، بينما تتعامل الألواح القياسية مع المنحنيات العريضة والكاسحة دون مشكلة.
العوامل المؤثرة على نصف قطر الانحناء
إن الحد المادي لمدى إحكام ثني اللوح الحجري المرن - الحد الأدنى لنصف قطر الانحناء - هو دالة مباشرة على بنيته. إن السُمك الكلي للوحة هو العامل الأكثر أهمية؛ حيث توفر القشرة الرقيقة في نطاق 2.5 مم إلى 5 مم مرونة أكبر من القشرة الأكثر سمكًا. كما تساهم مادة الدعم، وهي عادةً شبكة من الألياف الزجاجية أو ألياف البوليستر، بشكل كبير في سلامتها الهيكلية أثناء الانحناء، مما يمنع طبقة الحجر الطبيعي من التكسّر تحت الضغط.
إرشادات للمنحنيات القياسية مقابل المنحنيات الضيقة
كقاعدة عامة، يمكن تكسية الجدران العريضة والكاسحة التي يبلغ نصف قطرها 20 قدمًا (حوالي 6 أمتار) أو أكثر بألواح حجرية مرنة ذات سماكة قياسية دون مشكلة. لا تدفع هذه التطبيقات المادة إلى أقصى حدودها. وتتطلب العناصر المعمارية الأضيق، مثل تغليف عمود دعم أو إنشاء جدار حاد ومنحني، قشرة أرق لتحقيق نصف قطر يبلغ بضع بوصات فقط.
| نوع المنحنى | نصف القطر المطلوب | مواصفات اللوحة الموصى بها |
|---|---|---|
| منحنى معماري كاسح | أكبر من 20 قدماً (6 أمتار تقريباً) | الألواح القياسية 5.0 مم مناسبة بدون تعديل. |
| عمود محكم أو حائط مميز | حتى 4 بوصات تقريبًا (100 مم تقريبًا) | تتطلب لوحات أرفع من 2.5 مم - 3.0 مم لتحقيق أقصى قدر من المرونة. |
إن الالتزام بتفاوت الانحناء المحدد من الشركة المصنعة غير قابل للتفاوض. فمحاولة إجبار لوحة أكثر سمكًا على منحنى ضيق للغاية سيؤدي إلى حدوث كسور إجهادية، أو الأسوأ من ذلك، حدوث تفريغ حيث تنفصل الطبقة الحجرية عن دعامتها. تحقق دائمًا من متطلبات المشروع من ورقة بيانات المادة.
تقنيات الانحناءات الحادة
عندما يتطلب تصميم ما نصف قطر انحناء أضيق مما تسمح به اللوحة القياسية، هناك طريقتان ميدانيتان فعالتان. تتمثل الطريقة الأكثر مباشرة في تحديد منتج أرفع من البداية، حيث أن اللوحة مقاس 2.5 مم تتمتع بمرونة أكبر بطبيعتها من اللوحة مقاس 5 مم. وتتضمن الاستراتيجية الثانية قطع لوحة أكبر إلى شرائح أصغر وأضيق. يمكن للجزء الضيق من المادة أن يتوافق مع منحنى ضيق بسهولة أكبر من الجزء العريض، حيث يتم توزيع الانحناء عبر المزيد من الوصلات الرأسية. يسمح هذا النهج للمركبين بلف الأعمدة وغيرها من الميزات الصعبة بدقة.

التثبيت خطوة بخطوة على الأعمدة
لا يقتصر تغليف العمود على مجرد ثني اللوحة؛ إنها عملية منهجية حيث يحدد إعداد السطح والقطع الدقيق والتطبيق الصحيح للمادة اللاصقة السلامة الهيكلية واللمسة النهائية الجمالية للتركيب.
إعداد سطح العمود
يبدأ التركيب الناجح بركيزة معدة بشكل صحيح. تعتمد قوة الرابطة طويلة الأجل بالكامل على حالة سطح العمود قبل وضع أي مادة لاصقة. إن أي ملوثات مثل الغبار أو الزيت أو الطلاء السائب سوف تضعف الرابطة ويمكن أن تؤدي إلى التفكك بمرور الوقت. بالنسبة للمواد المسامية مثل الخرسانة أو الجص، فإن وضع طبقة أولية موصى بها هي خطوة غير قابلة للتفاوض لإغلاق السطح وضمان الالتصاق الأمثل.
- نظف العمود جيداً لإزالة أي شحوم، أو أتربة، أو مخلفات.
- تحقق من جفاف السطح تماماً قبل المتابعة.
- ضع دهان تمهيدي متوافق إذا كان العمود مصنوعًا من مادة مسامية أو إذا كانت مواصفات المشروع تتطلب أقصى قوة ربط.
قياس وقص اللوحة
الدقة أمر بالغ الأهمية في هذه المرحلة. فالقياسات غير الدقيقة تؤدي إلى وجود ثغرات، ومحاذاة خاطئة، وإهدار المواد. قم بقياس ارتفاع العمود ومحيطه بعناية، ثم انقل هذه الأبعاد إلى الجزء الخلفي من اللوح الحجري المرن. بالنسبة لمعظم ألواح MCM الخاصة بنا، كل ما تحتاجه هو سكين حاد لقطع نظيف وخالٍ من الغبار، وهي ميزة كبيرة في مواقع العمل حيث تكون الضوضاء والحطام مصدر قلق.
| خطوة التثبيت | الحجر المرن MCM المرن (JMS Decor) | القشرة الحجرية الرقيقة التقليدية |
|---|---|---|
| إعداد العمود | يوضع مباشرةً على السطح المستدير النظيف. | يتطلب بناء إطار “صندوق” مربع حول العمود. |
| طريقة القطع | سكين متعدد الاستخدامات أو مقصات؛ الحد الأدنى من الغبار والضوضاء. | المنشار الرطب مطلوب؛ ينتج عنه غبار وضوضاء كبيرة. |
| الانحناء والتركيب | تلتف اللوحة بسلاسة حول المنحنى دون حرارة. | لا يمكن ثنيه؛ يتطلب قطعاً مقصوصة وزوايا بزاوية 90 درجة. |
وضع المادة اللاصقة ووضع اللوحة
يؤثر تسلسل التركيب بشكل مباشر على الثبات النهائي. نوصي باتباع نهج من أسفل إلى أعلى للأعمدة. فالبدء من القاعدة يوفر أساساً متيناً ويمنع اللوح من الانزلاق لأسفل تحت وزنه أثناء معالجة المادة اللاصقة. ضع مادة لاصقة هيكلية عالية الجودة أو غراء البلاط بالتساوي على الجزء الخلفي من اللوح باستخدام مجرفة مسننة. اضغط على اللوح بإحكام على العمود، بدءاً من الأسفل، وقم بتنعيمه باستخدام الأسطوانة للتخلص من أي جيوب هوائية وضمان التلامس الكامل مع الركيزة.
ختم المفاصل والسطح
الخطوة الأخيرة هي حماية التركيب. بعد معالجة المادة اللاصقة بالكامل، افحص التماس العمودي حيث تلتقي حواف اللوحة. قم بوضع مادة مانعة للتسرب مرنة ومطابقة للألوان أو حشو مرن لإضفاء مظهر متجانس ومنع دخول الرطوبة. بالنسبة للأعمدة الخارجية أو الاستخدامات في المناطق ذات الرطوبة العالية مثل المنتجعات الصحية، من الضروري وضع طبقة من المادة المانعة للتسرب الواقية على سطح الحجر بالكامل. يعزز ذلك من مقاومته للأشعة فوق البنفسجية والماء والبقع، مما يضمن بقاء الطلاء النهائي متيناً لسنوات.
تقنيات الوصلة غير الملحومة
ويعتمد تحقيق سطح حجري متجانس ومتصل على عملية منضبطة من ثلاث مراحل: إعداد دقيق للحواف وتطبيق دقيق للمادة اللاصقة المطابقة للألوان ومزج منهجي للمفصل النهائي.
يُعد إنشاء وصلة لا يمكن اكتشافها بصرياً سمة مميزة للتركيب الاحترافي. فهو يحول الألواح الحجرية المرنة المتعددة إلى ما يبدو وكأنه لوح حجري واحد غير متقطع. لا تتعلق هذه العملية بإخفاء التماس بل بهندسة التماس ليختفي تماماً، مما يضمن بقاء التركيز على نسيج ونمط الحجر نفسه. توضح الخطوات التالية الطرق التي تم اختبارها ميدانياً لتحقيق هذه النتيجة بشكل متسق.
إعداد حواف اللوحة لملاءمة خالية من العيوب
أساس التماس غير المرئي هو الحواف المتحاذية تماماً. ويضمن هذا الإعداد الأولي إمكانية التقاء اللوحين دون أي فجوات محسوسة، مما يخلق سطحاً أملس ومتدفقاً وجاهزاً للربط. أي خلل في هذه المرحلة سيتم تضخيمه في وقت لاحق من العملية.
- تأكد من أن حواف اللوحة مقصوصة بشكل مستقيم تماماً ونظيفة وخالية تماماً من الغبار أو البقايا الناتجة عن القطع.
- قم بتركيب الألواح جافاً على سطح مستوٍ أو على الحائط للتأكد من إحكام تركيبها. يكشف هذا الفحص عن أي تناقضات أو فجوات بسيطة قبل وضع أي مادة لاصقة.
- إذا لزم الأمر، قم بصنفرة الحواف الخلفية أو الأمامية برفق باستخدام كتلة دقيقة الحبيبات لإزالة أي بقع عالية وإنشاء نقطة التقاء متساوية تماماً.
وضع المادة اللاصقة لرابطة غير مرئية
تقوم المادة اللاصقة بأكثر من مجرد ربط الألواح؛ فهي تصبح جزءًا من السطح النهائي. يعد استخدام حشو التماس الصحيح وطريقة التطبيق الصحيحة أمرًا بالغ الأهمية لإنشاء وصلة قوية لا تلفت الانتباه. والهدف من ذلك هو ملء التماس بالكامل دون انسكاب المواد الزائدة على وجه اللوحة، مما قد يتسبب في حدوث تلطيخ أو عدم تناسق في الملمس.
- اختر حشوة درزات عالية الجودة أو مادة لاصقة هيكلية عالية الجودة مطابقة للألوان بشكل احترافي للوحة الحجر المرنة الخاصة بك.
- ضع حبة صغيرة ومتسقة من المادة اللاصقة على طول حافة اللوحة الواحدة بالكامل.
- اضغط على اللوحين معاً بإحكام. يجب أن تنضغط كمية ضئيلة من المادة اللاصقة بشكل متساوٍ على طول الوصلة، مما يشير إلى أن التماس قد امتلأ بالكامل.
تشطيب ومزج المفصل
وتتضمن المرحلة الأخيرة تنظيف الوصلة وتركيبها بحيث تندمج مع اللمسة النهائية الطبيعية للحجر. هذه عملية دقيقة لإزالة المواد الزائدة ومزج الوصلة حتى تختفي، مما ينتج عنه سطح يبدو متماسكاً ومترابطاً.
- قبل معالجة المادة اللاصقة بالكامل، قم بإزالة المادة اللاصقة الزائدة بعناية باستخدام سكين معجون مرن أو قطعة قماش مبللة بالمذيب، حسب تعليمات الشركة المصنعة للمادة اللاصقة.
- بعد معالجة الوصلة بالكامل، قم بصنفرة منطقة التماس برفق باستخدام كتلة صنفرة ذات حبيبات دقيقة جداً لجعلها متساوية تماماً مع أسطح اللوحة.
- امسح المنطقة بقطعة قماش من الألياف الدقيقة لإزالة كل الغبار وفحص النتيجة النهائية. يجب أن يكون التماس غير قابل للكشف بصرياً ولمسياً.
أمثلة على التصميم: ردهات الفنادق والأقواس
تسمح الأنظمة الحجرية المرنة للمصممين بتنفيذ ميزات منحنية طموحة، ولكن بالنسبة لمشغلي الفنادق والمقاولين، تكمن قيمتها الحقيقية في تقديم هذه الجمالية الراقية مع تركيب سريع ومنخفض التعطيل يقلل من خسارة الإيرادات.
الجدران المميزة للردهة لتأثير العلامة التجارية
تُنشئ الألواح الحجرية المرنة جدراناً كبيرة الحجم وسلسة خلف مكاتب الاستقبال لتكوين انطباع أولي قوي. يوفر هذا الأسلوب رفاهية الحجر الطبيعي دون الحاجة إلى الوزن أو الهندسة الإنشائية أو الجداول الزمنية الطويلة للتركيب. بالنسبة لمُجدِّدي الفنادق، يعني ذلك إمكانية إجراء تحول كامل في الردهة بسرعة، وغالباً ما يتم ذلك دون انقطاع العمل بالكامل، مما يعكس هوية العلامة التجارية مباشرةً من خلال التشطيبات المخصصة عالية التأثير.
- احصل على مظهر حجري متجانس باستخدام ألواح كبيرة الحجم لتقليل اللحامات إلى الحد الأدنى، مما يخلق مظهراً راقياً دون الحاجة إلى الوزن والتكاليف الهندسية للألواح الصلبة.
- قم بتضمين أنماط مخصصة أو شعارات العلامة التجارية المطبوعة ثلاثية الأبعاد مباشرةً على اللوحات للحصول على نقطة محورية فريدة من نوعها تحمل علامة تجارية تتضاعف كخلفية لوسائل التواصل الاجتماعي.
- اختر من بين اللمسات النهائية المتنوعة، من الخرسانة البسيطة إلى الحجر الجيري المزخرف، لمواءمة جمالية الجدار مع هوية العلامة التجارية الأساسية للفندق.
التشطيبات غير الملحومة للأقواس المعمارية
بالنسبة للممرات والمداخل المقوسة، يوفر الحجر المرن لمسة نهائية سلسة ومتواصلة يصعب تحقيقها مع البلاط الصلب أو الألواح الحجرية الصلبة. كما أن قدرتها على الانحناء بشكل مثالي على طول المنحنى تزيل اللحامات القبيحة والقطع المعقدة والمستهلكة للوقت التي تتطلبها المواد التقليدية. وتعد هذه القدرة ضرورية لتعزيز الانسيابية المعمارية والحفاظ على المظهر المتميز في الممرات والمناطق الانتقالية.
- قم بتطبيق الألواح بسلاسة حول الأقواس الداخلية والخارجية على حد سواء، مما يخلق خطوطاً معمارية أنيقة ومتواصلة بين المساحات.
- احرص على إضفاء مظهر جمالي متناسق وراقٍ في جميع الممرات والمداخل التي تتميز بعناصر هيكلية منحنية.
- خصص تشطيباً متيناً وسهل الصيانة، وهو مطلب أساسي للممرات التي تشهد حركة مرور عالية في أي بيئة تجارية.
إكساء الأعمدة المنحنية ومكاتب الاستقبال
تتحول الأعمدة الهيكلية القياسية ومكاتب الاستقبال إلى عناصر تصميم متطورة عند تغليفها بألواح مرنة. تُعد متانة ومرونة هذه المواد مثالية لتغليف هذه الأسطح المنحنية عالية التلامس في ردهات الفنادق المزدحمة. يمزج هذا النهج بين المظهر الجمالي والوظائف العملية، ويحمي الأسطح من التآكل مع الارتقاء بالتصميم العام للمساحة.
- قم بلف الأعمدة الهيكلية - سواء كانت مستديرة أو مربعة - للحصول على لمسة نهائية خالية من الشوائب وخالية من الجص تحاكي الحجر الصلب أو الخشب أو الخرسانة.
- قم بتغطية واجهات مكاتب الاستقبال بألواح مقاومة للماء والخدش للتعامل مع التآكل اليومي من الأمتعة والعربات والضيوف.
- استخدم أنسجة وألوان الألواح التكميلية لتنسيق الأعمدة والمكاتب مع الجدران المحيطة بها، مما يخلق تصميماً متكاملاً ومتماسكاً تماماً.
الأدوات المطلوبة للتركيب المنحني


تعتمد اللمسات النهائية الاحترافية على الأسطح المنحنية على مجموعة صغيرة من الأدوات المتخصصة للقطع والالتصاق ومطابقة الألواح، وليس على ورشة عمل معقدة.
يتطلب تركيب القشرة الحجرية المرنة على الأعمدة والأقواس والجدران المنحنية معدات خاصة لضمان الحصول على نتيجة سلسة ومتينة. بينما يمكن قطع حجر MCM المرن بسكين بسيط للحواف المستقيمة، فإن تحقيق منحنيات مثالية يتطلب المزيد من الدقة. فالأدوات المناسبة لقطع الأشكال المعقدة، وتطبيق المادة اللاصقة بشكل موحد، وضغط القشرة في مكانها هي أدوات غير قابلة للتفاوض لأي مقاول أو عامل تركيب جاد.
معدات القطع الدقيقة
القطع النظيف والدقيق هو أساس التركيب المنحني الاحترافي. والهدف من ذلك هو تشكيل الألواح لتتبع محيط السطح بشكل مثالي، مما يقلل من رؤية الوصلات ويقلل من هدر المواد. بالنسبة للمنحنيات المعقدة، من الضروري استخدام أدوات كهربائية متخصصة. يسمح المنشار المقطعي أو المقصات المخصصة بالقطع بشكل حر، بينما يوفر منشار المسار حافة موجهة ومستقيمة تماماً للألواح التي تنتهي على سطح آخر. القطع الموجه بالشريط اللاصق هو طريقة يدوية موثوقة لتحديد الخطوط المعقدة واتباعها دون أخطاء.
| فئة الأداة | المعدات الأساسية | الوظيفة في التركيب المنحني |
|---|---|---|
| القطع | منشار بانوراما / مقصات / منشار الجنزير | إجراء عمليات قطع منحنية نظيفة ودقيقة تتبع محيط الركيزة دون تقطيع المواد. |
| تطبيق المادة اللاصق | مجرفة مسننة | توزع المادة اللاصقة للبلاط بالتساوي لضمان قوة ربط موحدة ومنع الجيوب الهوائية. |
| التشكيل والمطابقة | بكرة على شكل حرف J/دعامات مرجحة | يطبق ضغطًا ثابتًا ومتسقًا للضغط على الألواح على السطح وإزالة الهواء وتأمين الربط. |
أدوات وضع المواد اللاصقة
تعتمد الرابطة الآمنة وطويلة الأمد كليًا على التوزيع المناسب للمادة اللاصقة. على السطح المنحني، يعتبر التلامس غير المتناسق سبباً رئيسياً للفشل. المجرفة المسننة هي الأداة الصحيحة لهذه المهمة. من خلال تمشيط المادة اللاصقة الهيكلية أو غراء البلاط عبر الجزء الخلفي من اللوح والجدار، فإنك تقوم بإنشاء حواف بارتفاع محدد. عندما يتم الضغط على اللوح، تنهار هذه الحواف وتنتشر لتكوين طبقة متساوية وكاملة التغطية بدون هواء محبوس، مما يضمن أقصى قدر من الالتصاق.
أدوات التشكيل والمطابقة
بمجرد وضع اللوح الحجري على المادة اللاصقة، يجب الضغط عليه بقوة ليتوافق مع المنحنى. تعمل هذه الخطوة على إزالة فقاعات الهواء وتضمن تلامس 100% مع الطبقة اللاصقة. إن الأسطوانة المطاطية الصلبة على شكل حرف J هي الأداة المثالية لتطبيق ضغط متناسق على سطح اللوحة بالكامل. بالنسبة للمنحنيات الأكثر تعقيدًا أو المنحنيات المقعرة حيث قد ترغب اللوحة في الانسحاب، قد تكون هناك حاجة إلى دعامات أو أحزمة مرجحة لتثبيت القشرة بإحكام على الركيزة أثناء تثبيت المادة اللاصقة.
الخاتمة
لم تعد تكسية الأسطح المنحنية تتطلب المساومة على مظهر الحجر الطبيعي. حيث يضمن فهم الحد الأدنى لنصف قطر الانحناء للمادة واتباع طريقة تركيب دقيقة الحصول على تشطيبات خالية من التشققات وسلسة على الأعمدة والأقواس. توفر هذه التقنيات نتيجة متينة تفي بمعايير التصميم ومعايير الأداء العملي.
بالنسبة لمشروعك القادم، توفر لك أوراق البيانات الفنية الخاصة بنا مواصفات كاملة للمهندسين المعماريين والمقاولين. يمكنك أيضاً طلب عينة لمعرفة أداء أحجارنا المرنة على نماذجك الخاصة.
الأسئلة المتداولة
كيف يتم تركيب الحجر المكدس على الجدران المنحنية؟
يتطلب التركيب على الجدران المنحنية ألواح القشرة الحجرية المرنة الحديثة. تتضمن العملية إعداد ركيزة نظيفة وجافة، واستخدام مادة لاصقة عالية الجودة تعتمد على البولي يوريثان، والضغط بعناية على اللوح المرن على السطح. بالنسبة للمنحنيات الأكثر إحكامًا، يمكن أن يؤدي استخدام حرارة لطيفة ومضبوطة باستخدام مسدس حراري إلى زيادة مرونة اللوح لضمان ملاءمة سلسة وسلسة دون تعديلات هيكلية.
ما هو الحد الأدنى لنصف قطر الانحناء؟
ويعتمد الحد الأدنى لنصف قطر الانحناء على السُمك المحدد للمنتج ومواد الدعم. وبوجه عام، يمكن أن تنحني الألواح عالية الجودة إلى نصف قطر يتراوح بين 10 و14 بوصة بدون حرارة. بالنسبة للمنحنيات الأكثر إحكامًا، يمكن أن يسمح استخدام الحرارة بأنصاف أقطار صغيرة تصل إلى 4-6 بوصات، وهو أمر مثالي للأعمدة والسمات المعمارية الحادة. استشر دائمًا ورقة البيانات الفنية الخاصة بالشركة المصنعة لمعرفة المواصفات الدقيقة.
هل يمكنني لف عمود دائري؟
نعم، بالتأكيد. تم تصميم القشرة الحجرية المرنة خصيصاً لتطبيقات مثل تغليف الأعمدة المستديرة. إن قابلية الانحناء المتأصلة في هذه المادة، خاصةً عند دمجها مع تقنيات التطبيق الحراري لتحقيق انحناءات ضيقة نصف القطر، تجعلها حلاً مثالياً للحصول على تشطيب حجري أصيل وسلس على الأعمدة الداخلية والخارجية.
هل أحتاج إلى حرارة لثنيها؟
الحرارة ليست مطلوبة لجميع الانحناءات ولكنها تقنية قياسية لتحقيق منحنيات أكثر إحكامًا. بالنسبة للجدران الكبيرة أو الجدران الكاسحة أو الأقواس اللطيفة، غالباً ما تكون المرونة الطبيعية للمادة كافية. ومع ذلك، بالنسبة لتغليف الأعمدة أو التنقل في الزوايا الحادة، فإن استخدام الحرارة المتحكم فيها باستخدام مسدس حراري يجعل اللوح أكثر مرونة، مما يضمن ملاءمة مثالية ويمنع إجهاد المواد.
هل ستتشقق عند ثنيها؟
عندما يتم تركيب القشرة الحجرية المرنة عالية الجودة وفقاً لإرشادات الشركة المصنعة، فإنها لن تتشقق. تم تصميم هذه المادة باستخدام دعامة متينة من الألياف الزجاجية أو البوليستر توفر قوة شد وتسمح لها بالتوافق مع المنحنيات. يتم تجنب التشقق من خلال احترام الحد الأدنى لنصف قطر الانحناء للمنتج واستخدام مسدس حراري لزيادة المرونة للانحناءات الأكثر إحكاماً.
أين يمكنني استخدام بلاط التقشير والعصا؟
يعتبر البلاط المقشر واللاصق هو الأنسب للأسطح الداخلية الملساء والنظيفة والجافة في البيئات منخفضة الرطوبة. وهي خيار ممتاز للمشاريع التي تقوم بها بنفسك مثل بلاط المطبخ الخلفي أو الجدران المزخرفة أو الزخارف على الأثاث. من الضروري تجنب استخدامها في المناطق ذات الرطوبة العالية مثل الأسطح الداخلية للاستحمام أو على الأرضيات التي تشهد حركة مرور كثيفة للأقدام أو على الأسطح ذات النسيج مثل الطوب، حيث قد تفشل الرابطة اللاصقة بمرور الوقت.